Appearance
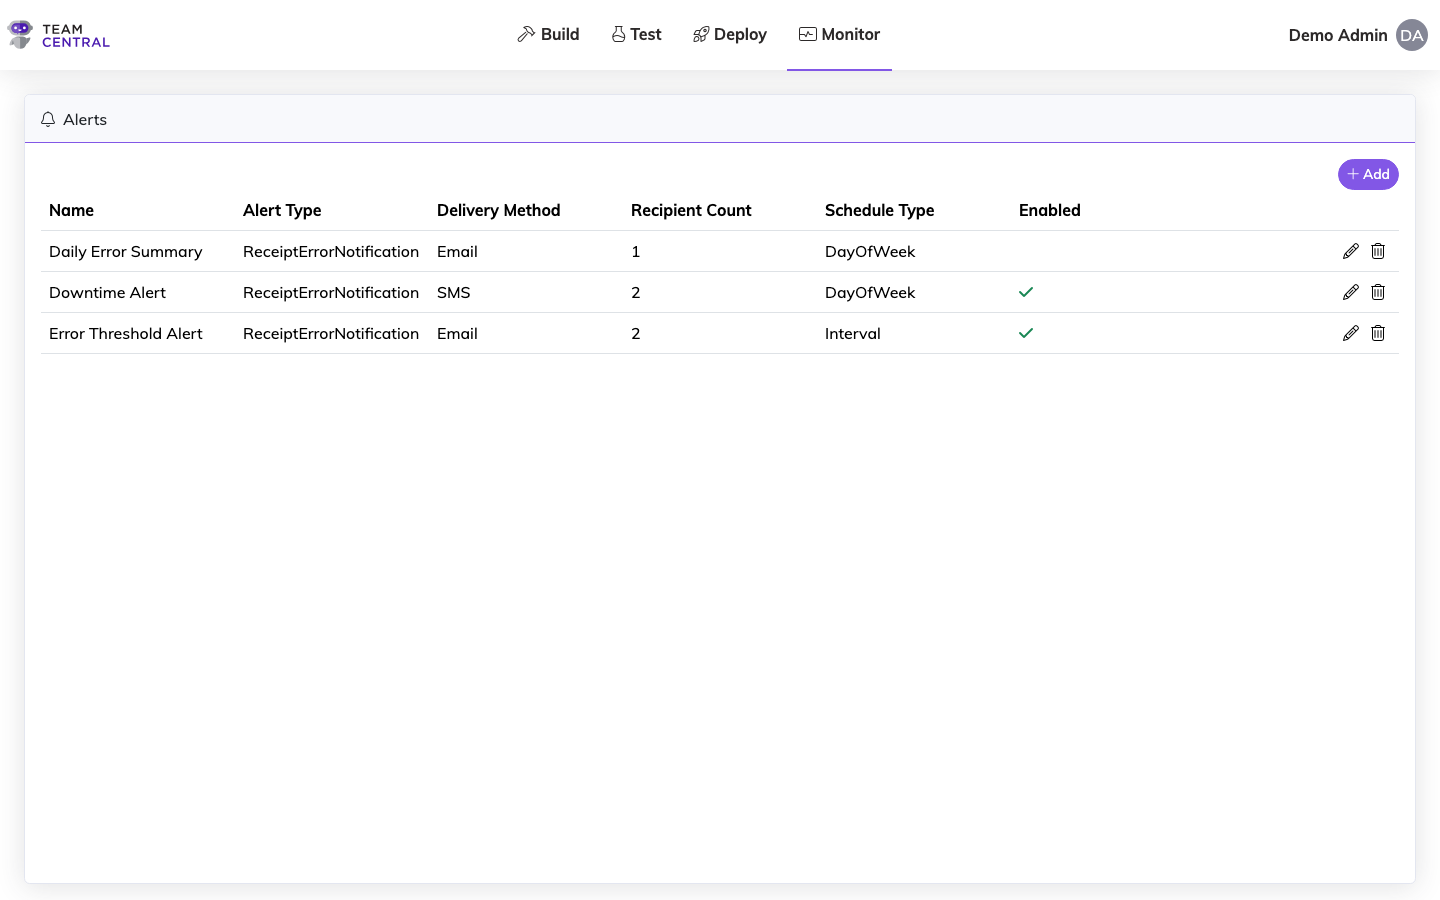
Alerts
Configure automated alerts to be notified when integration errors exceed thresholds or endpoints go down. Alerts support Email and SMS delivery methods with flexible scheduling.
Key Features
- Alert Types — Receipt Error Notifications triggered by processing failures
- Delivery Methods — Send alerts via Email (To/Cc/Bcc recipients) or SMS
- Scheduling — Configure alert checks on an interval, day-of-week, or day-of-month schedule
- Enable/Disable — Toggle alerts on or off without deleting the configuration
Create a New Alert
- Select Monitor > Alerts.
- Select +Add.
- Enter a Name.
- Toggle Enabled ON to begin receiving notifications.
Notes
When an Alert is enabled, you will receive notifications based on your selected schedule. To pause an Alert, edit the Alert and toggle Enabled OFF.
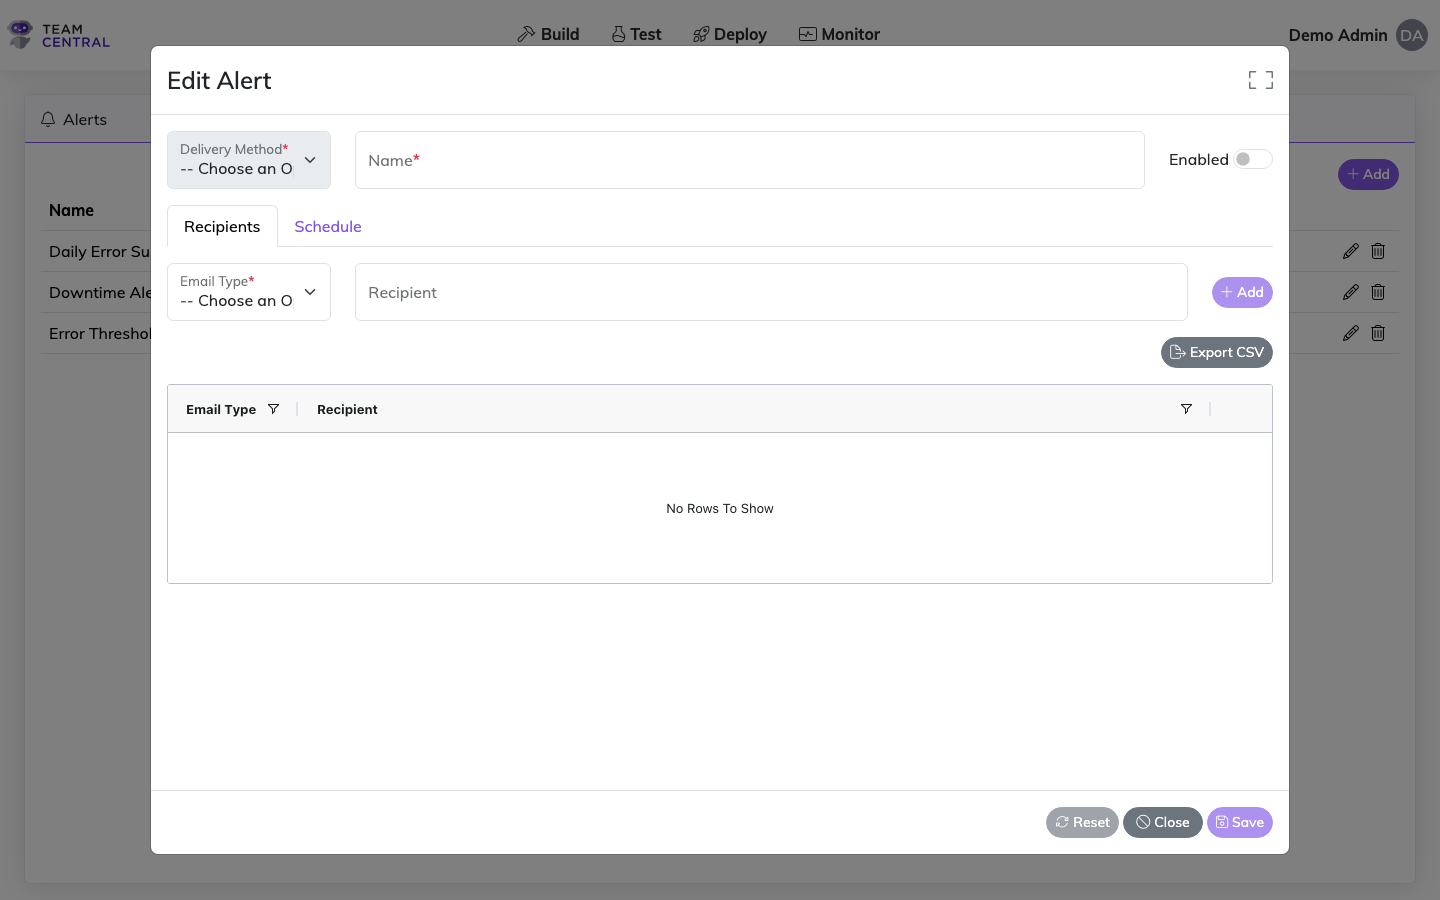
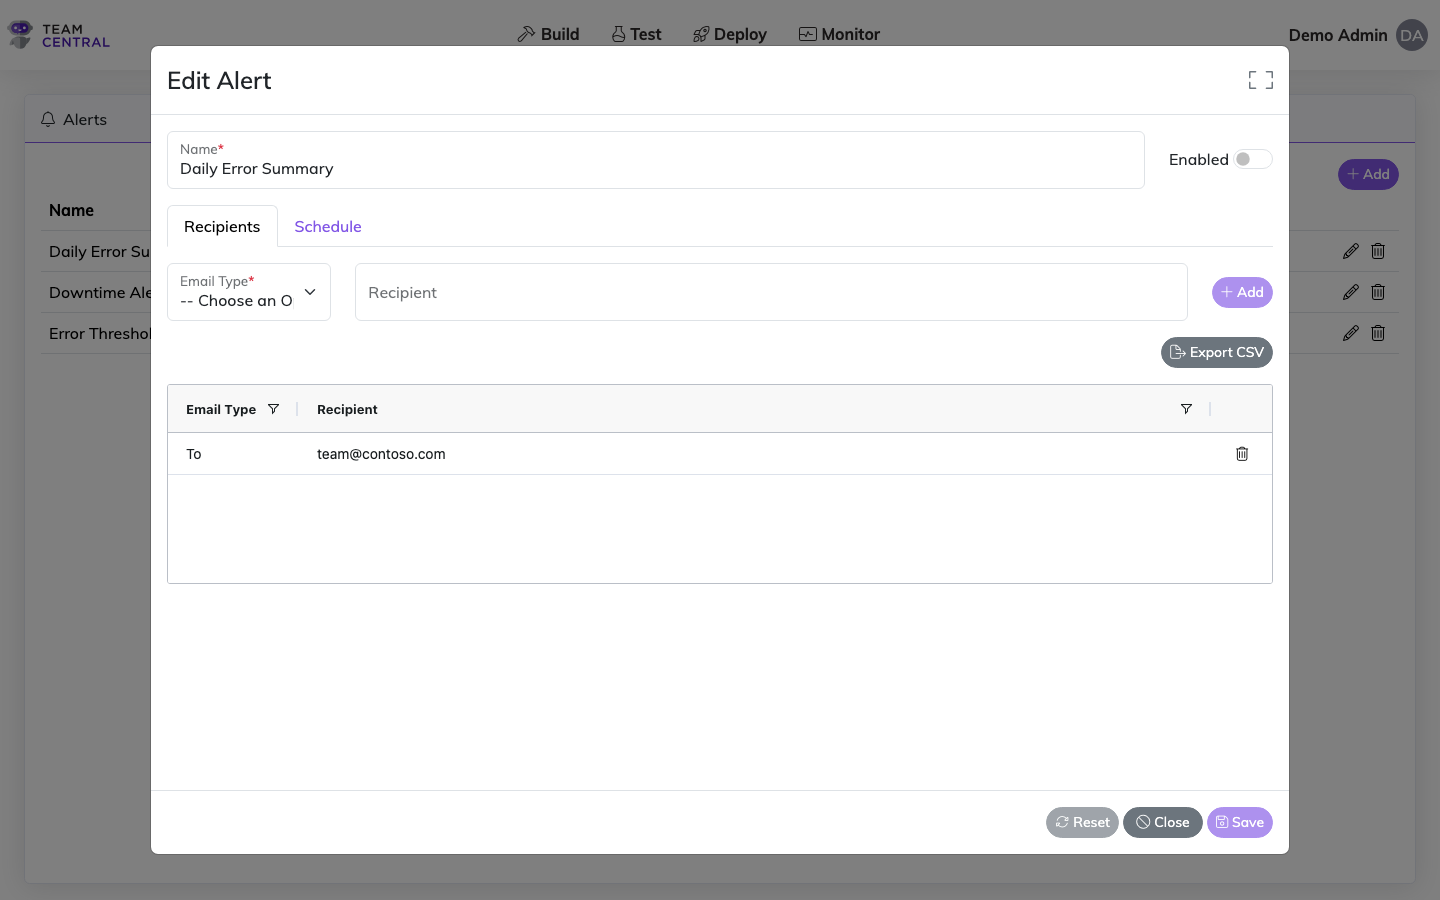
- On the Recipients tab, select an Email Type (To, Cc, or Bcc).
- Enter the email address in the Recipient field and select +Add.
- Repeat this process to add as many recipients as needed.
- Select the Schedule tab.
- Select a Scheduler Type; then, use the table below to set up the schedule.
Schedule Configuration
| Scheduler Type | Do this |
|---|---|
| On-Demand Schedule | No additional set-up is required for On-Demand scheduling. |
| Interval Schedule | Enter the Minute and Second times. Then, select Save. |
| Day of the Week Schedule | Select a Time Zone. Select Add Time. In the pop-up window, select the appropriate weekday(s) and enter a time; then, select Save. The schedule will appear in the scheduler table. Repeat this process to create as many schedules as needed; then, select Save. |
| Day of the Month Schedule | Select a Time Zone. Select Add Time. In the pop-up window, select the appropriate date(s), enter a time, and select a Run Condition; then, select Save. The schedule will appear in the scheduler table. Repeat this process to create as many schedules as needed; then, select Save. |
Edit an Alert
- Select Monitor > Alerts.
- Select the edit icon in the appropriate row.
- As needed, edit all necessary fields on both the Recipients tab and the Schedule tab.
- Select Save.
Delete an Alert
- Select Monitor > Alerts.
- Select the delete icon in the appropriate row.
- Select OK to confirm.
Related Pages
- Monitor Dashboard — View platform health at a glance
- Error Logs — Investigate processing errors
- Messages — Inspect individual integration messages