Appearance
Action Mapping
Once all of the Endpoints are added to the Data Hub, you need to map each Endpoint Action, tying all of your Schema Definitions to the Connectors by mapping how the data needs to flow between systems. Most Connectors utilize JSON or XML language to "talk" to the Common Model; however, the types of maps are dependent on the type of connector data you are mapping to (JSON, XML, SQL, and Delimited Files). The Connector Property field must match the exact naming and language of the Connector.
INFO
When you open the Mapping screen, you will see a black code box on the left, with an open area to add properties on the right. The code box will display the details as you create the Mapping. The Connector data is always shown on the left side in blue text, while the Common Model data (Schema Definitions) is shown on the right side in purple text. The arrows between the Connector and Common Model indicate the direction data will flow. The arrow will always point towards the application receiving the data. Fixed values will always show in orange text.
For example, when a connection is publishing data to the Common Model via JSON protocols, the arrow will point from the Connector to the Common Model. However, when working on the subscribing side, the arrow will point towards the Connector -- since the data is flowing from the Common Model to the Connector.
Advanced Tool
Advanced users can view, and in some cases modify, the underlying configuration that is fed into the engine. To access code view, select the code icon in the top right corner. See Code View for more details.
NOTES
- The following instructions for Mapping Endpoint Actions are generically written for JSON protocols; however, each protocol will have its own distinct appearance and follow its own standards (e.g. JSON will present within curly brackets, while XML will present within square brackets).
- Additionally, these instructions guide you through the addition of a Simple Property. However, you will select the most applicable Property Type for your protocol and data; then, loosely follow the same instructions.
- If a Template was used to configure the Endpoint, some Mapping will be pre-populated; you can edit the Mapping as needed to achieve the desired syncs.
- For detailed descriptions of mappable properties for each protocol, see the Mapping Properties of Endpoint Actions per Protocol section below.
Map Endpoint Actions
Select Build > Data Hubs from the main menu.
Select the appropriate Data Hub; then, select the appropriate parent Endpoint.
Ensure you are on the Data Source tab, and select the appropriate Event.
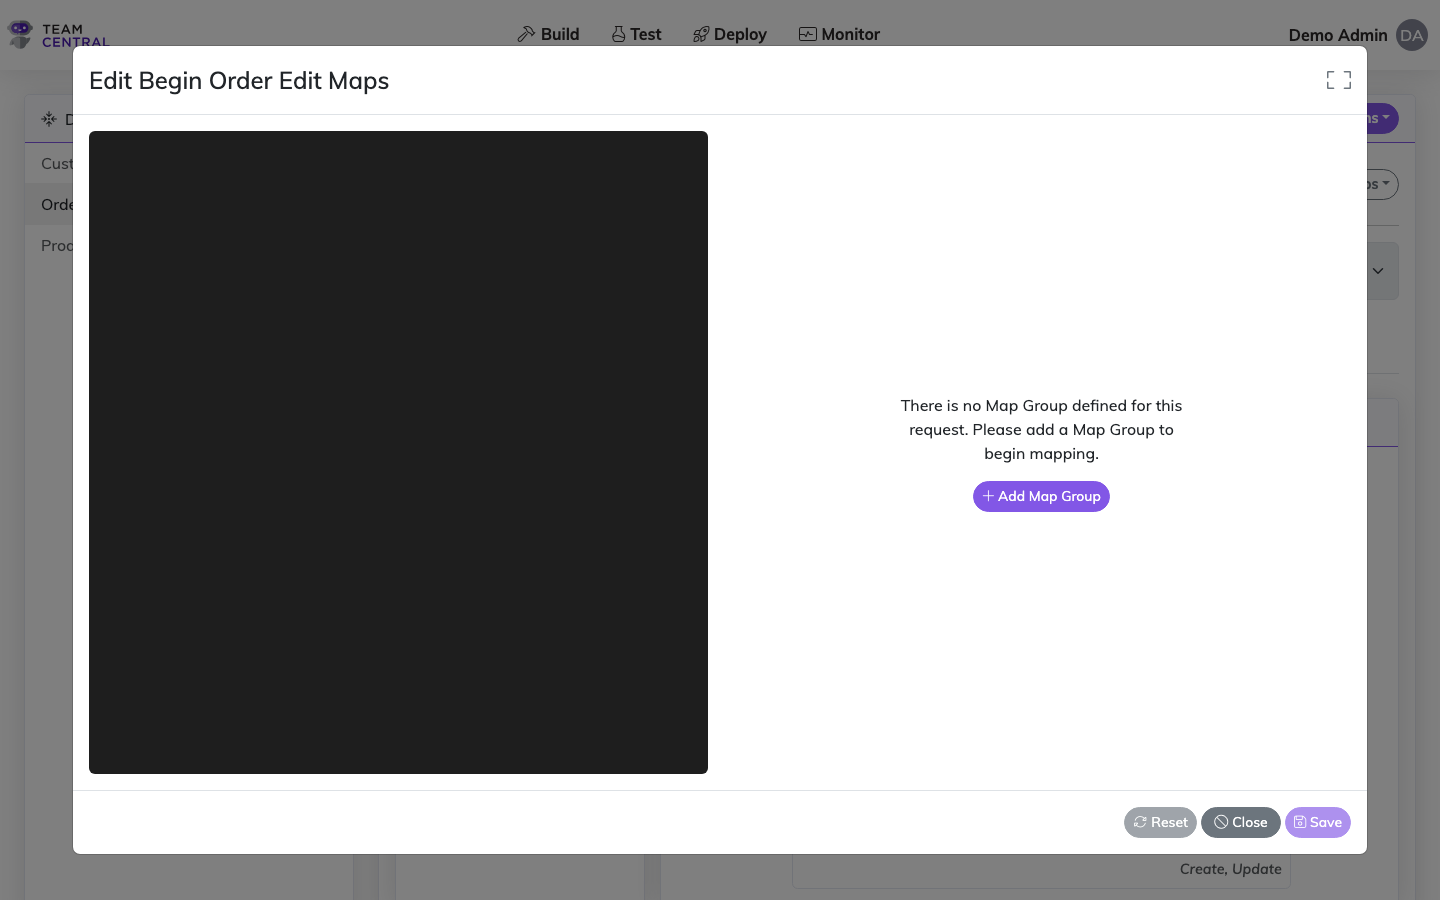
Select the menu icon > Edit Maps.
As needed, select + Add Map Group.
NOTE
If the Endpoint was configured using a Template, you will not see this screen as some Mapping will be pre-populated; you can continue to the next step.
Select the top row of the code box on the left side.
NOTE
If you are simply adding a map to the route, then select the top line in the code box. However, when you want to add a map to a specific action (e.g. Saves), select that line in the left pane (specifically, where on the payload you want to add your map).
Select how to map the data via the Add Element selectors and, as needed, toggle ON Make List. Make List allows you to add a list structure instead of an object structure when configuring the mapping payload.
NOTES
- Only mappable options will be displayed based on your configured Endpoints.
- You can add one or more of the Element types to a single Map.
- For detailed descriptions of mappable properties for each protocol, see the Mapping Properties of Endpoint Actions per Protocol section below.
Depending on the method, select a Central Property and/or define the Connector Property. Or, when mapping a File connector, enter a Field Position and Field Width.
NOTE
The Field Position refers to the character position the field starts on; the Field Width refers to how many characters are in the data field you are syncing.
TIP
- To delete a map property, select the delete icon in that row of the code.
- To adjust the order of a Mapping element, select the up or down arrow in that row of the code.
As needed, adapt the data.
NOTE
It is possible to adapt the data as it is published to the Common Model or as an Endpoint subscribes to that data. For additional information and instructions, see the Data Adaptation section.
Repeat the previous steps to construct all of the necessary Mapping.
TIP
While Mapping, select Save as needed; doing so will not close the window.
When finished, select Save; then select Cancel to close the window.
Mapping Related Data Properties
When mapping a save/subscribe action, the Central Property picker includes properties from related entities — not just the entity's own schema. These are properties that have been flagged as Related Data on a related schema and are accumulated automatically when Central resolves the entity's foreign key relationships.
Related Data properties are displayed with a label indicating which relationship they come from:
CompanyName (From CompanyId)
Select these properties exactly as you would any other Central Property. The mapping engine reads the value from the entity's Related Data collection at sync time.
When are Related Data properties available?
Related Data properties only appear in the Central Property picker for save/subscribe actions. They are not available for read/publish actions because the data has not yet been accumulated at that point in the pipeline.
The list of available Related Data properties is determined by:
- The foreign key relationships defined on the entity's schema
- Which properties on those related schemas have the Related Data flag enabled
- Any Extra Primary Keys defined on the related schemas
For a deeper explanation of how Related Data is accumulated and when to use it, see Related Data.
Generated Value Mappings
When mapping a save/subscribe action, you can configure a field to produce its value at sync time rather than sourcing it from the entity. Use a Generated Value mapping when the connector requires a field that Central itself doesn't hold — a freshly minted password, an idempotency token, a per-sync timestamp, and so on.
Generated Values appear in the Mapping Type dropdown as a standard option, alongside Property, Primary Key, Fixed Value, etc. Select it, and a Generator picker appears with the following choices:
| Generator | What it produces |
|---|---|
| New GUID | A fresh Guid.NewGuid() each time the map runs |
| Current Date/Time | DateTime.UtcNow at the time of the save |
| Current Day / Month / Year | Integer components of the current date |
The generated value seeds the normal transform chain — you can run subsequent transforms on it (e.g. format a generated date, hash a generated GUID) just like any other source value.
Generated Value mappings are write-only — they are ignored on read actions, which prevents the generator from overwriting values coming back from the connector. They are also not offered inside MultiPropertyMap structures; add the Generated Value as a leaf map alongside other inner maps.
Hiding generated secrets from logs
When the generated value is a credential (e.g. a password sent on account creation), select HideFromLogging in the map's Behaviors tab. The real value is still sent in the connector request, but appears as [hidden] in stored endpoint logs.
NOTE
The Connector Property field still applies — it identifies where on the connector payload the generated value is written. The generator replaces the source (which would normally be the entity's field value), not the target.
Map Group Filters
Map Groups support configurable filters that control which data is processed during a sync. Filters are configured on the Filters tab when editing a Map Group.
A filter icon appears on Map Groups in the visual editor when filters are configured.
How Filters Work
Filters use the same evaluation model as other filters in the platform — you define one or more filter groups, each containing one or more evaluations. Evaluations compare a property on the data model against a static value or a variable using operators like =, !=, >, <, Is Blank, Not Blank, and Regex.
- Within a group, evaluations are chained with AND or OR (configurable per group).
- Between groups, groups are chained with AND or OR (configurable per group).
Behavior by Map Group Type
The Filters tab displays contextual help text explaining the behavior:
| Map Group Type | Behavior |
|---|---|
| Looping List | Filters are evaluated against each item in the list. Items that do not pass are skipped — they will not be read into the model or written to the connector. |
| Non-looping | Filters are evaluated against the model. If the model does not pass, the entire Map Group is skipped. |
Filter Values
Evaluations support two value sources:
- Static — a fixed value (e.g.,
Active,1234). - Variable — a reference to an endpoint variable, evaluated at sync time (e.g.,
{CurrentDate}). Variables must be defined on the endpoint's Variables tab.
Example Use Cases
- Skip inactive line items on save: Add a Looping List filter where
Status = Activeto only write active items to the connector. - Skip a Map Group for certain entity types: Add a filter on a non-looping Map Group where
Type = Bookingso the group only runs for booking entities. - Filter by date using a variable: Add a filter where
ModifiedDate > {LastSyncDate}to only process recently changed items.
Filtering Looping List Items by Operation (deletes / _destroy)
Each item in a Looping List is evaluated with its own operation, based on its key state:
| Item state | Item operation |
|---|---|
| New (no key yet) | Create |
| Existing (has a key) | Update |
| Removed (deleted) | Delete |
The Looping List Map Group's Supported Operations then act as a filter on which item operations are emitted:
| Looping List Supported Operations | Items written |
|---|---|
| (none set) or Create, Update | non-deleted items only |
| Create, Update, Delete | all items (including deleted) |
| Delete | deleted items only |
This is why, by default, deleted children are left out — and why you simply add Delete to include them. (The Delete option only appears in the operations picker when the Map Group is a Looping List.) Some target systems expect deleted children to be sent in the same list with a delete marker, e.g. Rails-style nested attributes where a removed line is { "id": 9, "_destroy": true }.
The "Delete is never assumed" rule
Delete is only ever applied when you choose it explicitly — empty Supported Operations means Create + Update, never Delete. This holds at every layer:
- On the Looping List Map Group, Delete must be listed for deleted items to be emitted at all.
- On each Property Map, Delete must be listed for that field to appear on a delete line. (The Delete option only appears for property maps inside a Looping List.)
So an ordinary field map (no operations set) is omitted from delete lines — a delete line carries only the maps you explicitly tag with Delete (typically the id/key and a delete flag).
Recipe: a _destroy delete flag
To produce output like:
json
"order_items_attributes": [
  { "id": 2, "description": "Widget A" },
  { "description": "Widget B" },
  { "id": 9, "_destroy": true }
]- On the Looping List Map Group, set Supported Operations to Create, Update, Delete.
- On the id / primary key property map, set Supported Operations to Update, Delete (present on existing and deleted lines, omitted on new ones).
- Add a Fixed Value property map with Connector Property
_destroy, valuetrue, and Supported Operations Delete only — it appears only on deleted lines. - Leave ordinary field maps (e.g.
description) with no operations set — they appear on create/update lines and are omitted from delete lines.
TIP
Do not add Delete to the Supported Operations of a Looping List's inner item Map Group as a shortcut — operations are not inherited onto delete lines that way. Tag the individual property maps instead.
Protocol support
This applies to JSON, XML, and File (delimited) Looping Lists. For File output, a deleted item becomes an additional row; tag a flag column (and the key columns) with Delete so they appear on delete rows.
SQL is not applicable — SQL saves write a flat set of parameters rather than an embedded list, so child deletes are handled by the standard delete pipeline rather than embedded delete lines.
NOTE
The Delete operation choice can be saved at any time, but deleted lines are only emitted once the platform release that implements this behavior is deployed to your environment.
Mapping Properties of Endpoint Actions per Protocol
NOTE
Users should be familiar with XPath to complete Read mapping.
JSON Reads
All JSON Read maps use JSONPath for the Connector Property to tell the mapping engine where on the payload we should map the data from.
| Property Type | Description |
|---|---|
| Property | Maps a single value in a JSON document to a property on your Schema. |
| Multi-Property | Generally used in tandem with a Transform, it takes multiple values on a JSON document, transforms those values in some way, and then sets the transformed result onto a property on your Schema. |
| Looping List | Used to bind an array on the connector JSON payload to a list of items on your schema. For example, a Looping List can be used to map the lines of a Sales Order or the Prices of an Item. |
JSON Saves
| Property Type | Description |
|---|---|
| Property | Maps a single value on your schema to a property on the connector's JSON input. |
| Multi-Property | Generally used in tandem with a Transform, it can take multiple properties on your Schema and output a single property on the connector's JSON input. |
| Nested Property | Used to create a static JSON nested property. Usually used in tandem with another map that is embedded inside of it. For example, in this input: { "customerName": { "firstName":"Marc", "lastName":"Johnson"}}, the nested Property would be "customerName". |
| Static List | Used to create a static JSON array to insert static items, such as "itemPrices":[ {"price": 23.12}]. |
| Looping List | Used to bind a dynamic list of items on your Schema list to an array of items on the connector's JSON input. |
XML Reads
Uses XPath to map the data from the connector to your Schema. It is important to note that the first step in creating an XML Read Mapping is to add the root Element of the XML Document. For example, in a SOAP document, the root is typically <Envelope></Envelope>.
| Property Type | Description |
|---|---|
| Simple Element | Maps a single value in an XML Element or XML Attribute to a property on your Schema. To map the first name value, enter "FirstName." To map from a nested value (e.g. street), enter "Address/Street." For an attribute, enter "Person/@title." |
| Multi-Element | Generally used in tandem with a Transform, it can take multiple values on an XML document, transform those values in some way, and then sets the transformed result onto a property on your Schema (e.g. to combine a person's first name and last name). |
| Looping List | Used to map a list of repeating items in the connector XML document to a list of items on your Schema. For example, a Looping List can be used to map the phone numbers into a list on the Schema. |
XML Syntax Example
xml
<Person title="Mr.">
  <FirstName>John</FirstName>
  <LastName>Doe</LastName>
  <Address>
    <Street>123 Main St</Street>
  </Address>
  <PhoneNumbers>
    <PhoneNumber type="home">555-1212</PhoneNumber>
    <PhoneNumber type="work">555-2323</PhoneNumber>
  </PhoneNumbers>
</Person>
XML Saves
On an XML Save, your maps will be used to build the XML document that gets sent to the Connector. Every layer of the XML document needs to be built and accounted for in your mapping. You will be mapping both structure and content.
| Property Type | Description |
|---|---|
| Element | Adds an element to the XML with the value selected from the Schema. |
| Attribute | Attributes can be added to any Element and will map to the value selected in the Schema. |
| Multi-Element | Generally used in tandem with a Transform, it can take multiple properties on your Schema and output a single Element on the connector's XML input. |
| Nested Element | Used to create a static XML nested Element. Typically used in tandem with another map that is embedded inside of it. For example, in this input: <customerName><firstName>Marc</firstName><lastName>Johnson</lastName></customerName>, the nested Element would be <customerName>. |
| Static List | Used to create a static list of XML items where you can insert static items. For example: <itemPrices><price>23.12</price></itemPrices>. |
| Looping List | Used to bind a dynamic list of items on a list on your Schema, to a list of items on the connector's XML input. |
SQL Reads
| Property Type | Description |
|---|---|
| Column | Maps a single value from a database to a property on your Schema. |
| Multi-Property | Generally used in tandem with a Transform, it can take multiple database columns, transform those values in some way, and then sets the transformed result onto a property on your Schema. |
| Looping List | Used to map child/line-item rows from a query result into a list property on your Schema. The query returns parent and child data together in a flat result set, and the engine groups rows by a parent identifier column. |
SQL Looping List — How It Works
Unlike JSON or XML where child data is nested inside the document structure, SQL result sets are flat — every row contains both parent-level and child-level columns. A Looping List tells the mapping engine how to reconstruct the parent/child hierarchy from that flat data.
Reads: The engine groups all returned rows by the value in the Connector Property defined on the Looping List (the parent identifier column, e.g. ShipmentID). The first row in each group supplies the parent-level property values, and each row in the group creates a new item on the Schema list.
Example: A query returns shipments with their packages:
| ShipmentID | ShipDate | PackageID | Height | Width |
|---|---|---|---|---|
| SHP001 | 2026-01-15 | PKG001 | 10 | 5 |
| SHP001 | 2026-01-15 | PKG002 | 15 | 10 |
| SHP002 | 2026-01-20 | PKG003 | 20 | 15 |
With a Looping List whose Connector Property is ShipmentID, this produces two Shipment entities — SHP001 with two Packages and SHP002 with one Package.
To set up a SQL Read Looping List:
- Add a Looping List map group to your read action mapping.
- Set the Connector Property to the column that identifies the parent record (e.g.
ShipmentID). - Set the Central Property to the list property on your Schema (e.g.
Packages). - Inside the Looping List, add Column maps for each child property (e.g.
PackageID,Height,Width). - Add Column maps at the parent level (outside the Looping List) for parent-only properties (e.g.
ShipDate).
SQL Saves
| Property Type | Description |
|---|---|
| Property | Maps a single value on your Schema to a column on a database. |
| Multi-Property | Generally used in tandem with a Transform, it can take multiple properties on your Schema and output a single column on the database. |
File Reads
| Property Type | Description |
|---|---|
| Column | Maps a single value from a file to a property on your schema. |
| Multi-Property | Generally used in tandem with a Transform, it can take multiple file columns, transform those values in some way, and then set the transformed result onto a property on your Schema. |
| Looping List | Used to map child/line-item rows from a delimited file into a list property on your Schema. The file contains parent and child data together in flat rows, and the engine groups rows by a parent identifier column. |
File Saves
| Property Type | Description |
|---|---|
| Property | Maps a single value on your Schema to a column on a character delimited file. |
| Multi-Property | Generally used in tandem with a Transform, it can take multiple properties on your Schema and output a single column on a file. |
| Looping List | Used to flatten a list of child items from your Schema into individual rows on the output file, with parent columns repeated on each row. |
File Looping List — How It Works
Delimited files (CSV, TSV, etc.) are inherently flat — there is no nesting. A Looping List tells the mapping engine how to reconstruct the parent/child hierarchy on reads, and how to flatten it back out on writes.
Reads: The engine groups all rows in the file by the value in the Connector Property defined on the Looping List (the parent identifier column, e.g. ShipmentID). The first row in each group supplies the parent-level property values, and each row in the group creates a new item on the Schema list. This works identically to the SQL read behavior described above.
Writes: The engine does the reverse — for each child item in the Schema list, it produces one row in the output file. Parent-level columns (mapped outside the Looping List) are repeated on every row alongside the child-level columns.
Example: A CSV file containing shipments with their packages:
ShipmentID,ShipDate,PackageID,Height,Width
SHP001,2026-01-15,PKG001,10,5
SHP001,2026-01-15,PKG002,15,10
SHP002,2026-01-20,PKG003,20,15
On read, this produces two Shipment entities — SHP001 with two Packages and SHP002 with one Package.
On write, a Shipment entity with two Packages produces two rows in the file, both sharing the same ShipmentID and ShipDate values.
To set up a File Looping List:
- Add a Looping List map group to your action mapping.
- Set the Connector Property to the column that identifies the parent record (e.g.
ShipmentID). - Set the Central Property to the list property on your Schema (e.g.
Packages). - Inside the Looping List, add Column/Property maps for each child property (e.g.
PackageID,Height,Width). - Add Column/Property maps at the parent level (outside the Looping List) for parent-only properties (e.g.
ShipDate).
Fixed-Width Files
| Property Type | Description |
|---|---|
| Property | Maps a fixed character length for each field. |
Map Preview
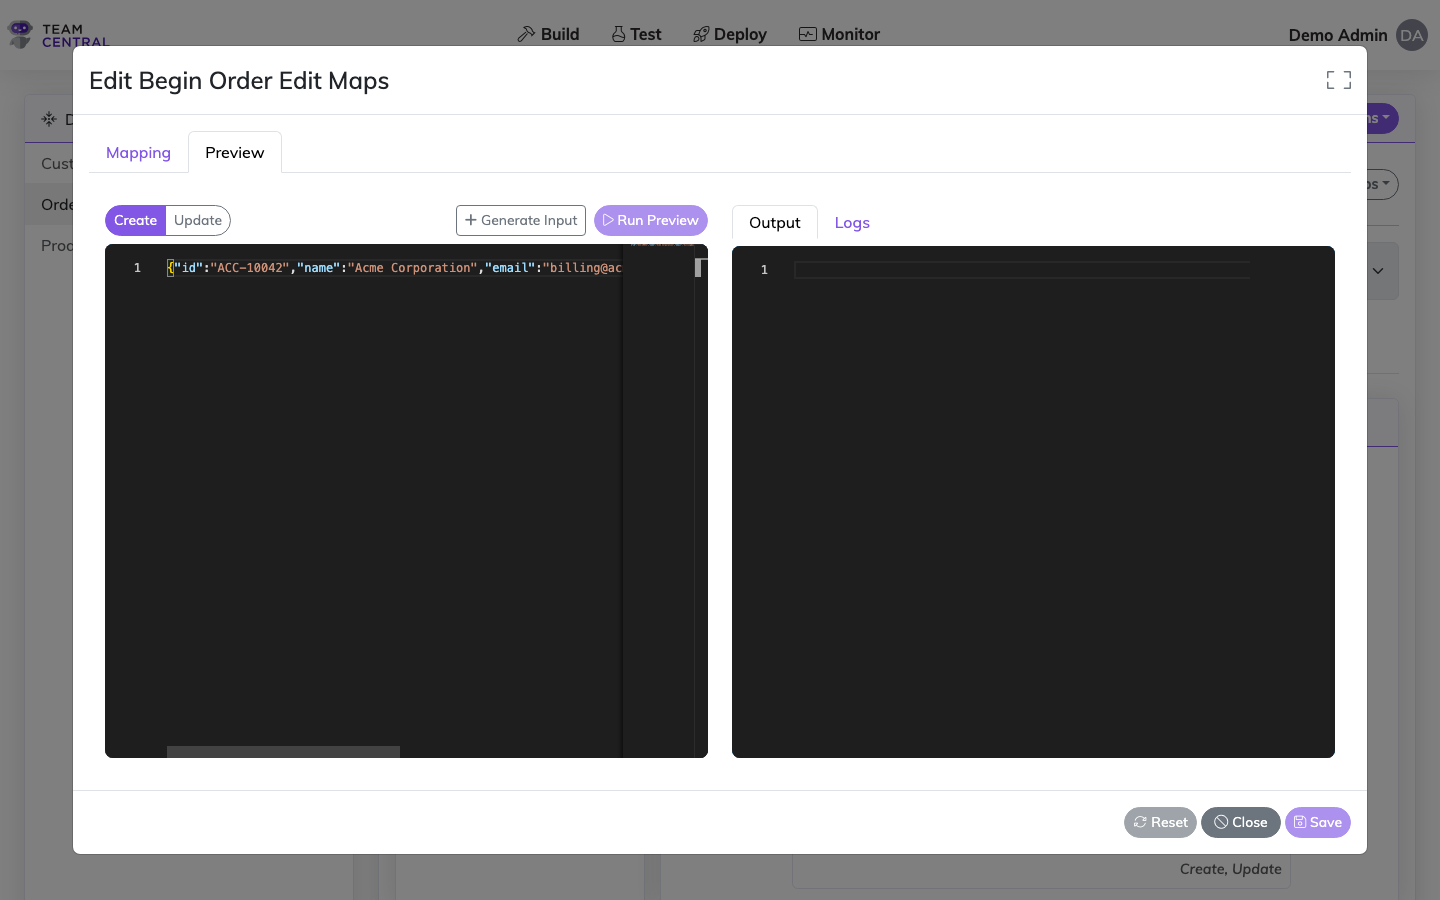
The Map Preview panel lets you test your mapping configuration against real data without running a full sync. It is available in the mapping editor for both read and write (save) directions.
To open it, select the Map Preview tab in the mapping editor.
Read Direction (Publish)
The input for a read preview is a single connector record — one item from the payload your connector would return during a Get Changes or API Read call.
To get test data:
- Open the endpoint's action configuration and use the Test Request button to run a live connector call.
- Copy a single record from the response body (not the full list).
- Paste it into the Map Preview input panel.
- Select Run Preview to see how your maps transform the connector data into a Common Model entity.
TIP
The output panel defaults to code view showing the raw mapped JSON. Use the toggle in the top right of the output panel to switch to tree view for a more readable field-by-field breakdown.
Write Direction (Save / Subscribe)
The input for a write preview is a Common Model entity message — representing data flowing from the Common Model out to your connector.
To get test data:
- Select Generate Input to automatically build a trimmed entity message pre-populated with the fields your maps reference. Edit the values directly in the editor to match a realistic record.
- Alternatively, copy a message from the Monitoring screen (search for a recently processed message of the correct entity type) and paste it into the input panel.
Use the Create / Update toggle to test both operation types — some maps behave differently depending on the operation.
INFO
The generated input wraps the entity in an EntityMessage envelope (with system, entityType, and payload). This matches the format used internally by the sync engine, so what you test here is what the engine will actually receive.
Logs
After running a preview, select the Logs tab on the output panel to review any mapping warnings or errors reported by the engine.
See Also
- Data Adaptation — Transform and adapt data during mapping
- Endpoint Configuration — Configure endpoint action inputs and parameterization
- Code View — View and edit the underlying mapping configuration
- Key Scraping — Configure how primary keys are indexed after saves