Appearance
Data Hubs
Data Hubs are versioned configurations that define how data flows between connected systems. Each hub connects the systems (endpoints) that have or need the data defined within your data models. You create a Data Hub by adding endpoints, configuring the actions each endpoint can execute, and then mapping endpoint actions to the common model. This ties all of the data together using your previously defined schema definitions and configured connectors.

Key Features
- Versioned Configurations — Maintain draft and live versions of your data hub configurations
- Publisher & Subscriber Endpoints — Define how data is read from and written to connected systems
- Property Mapping — Map fields between your canonical data model and connector-specific formats
- Scheduling — Configure when publishers run to collect data
Build a Data Hub
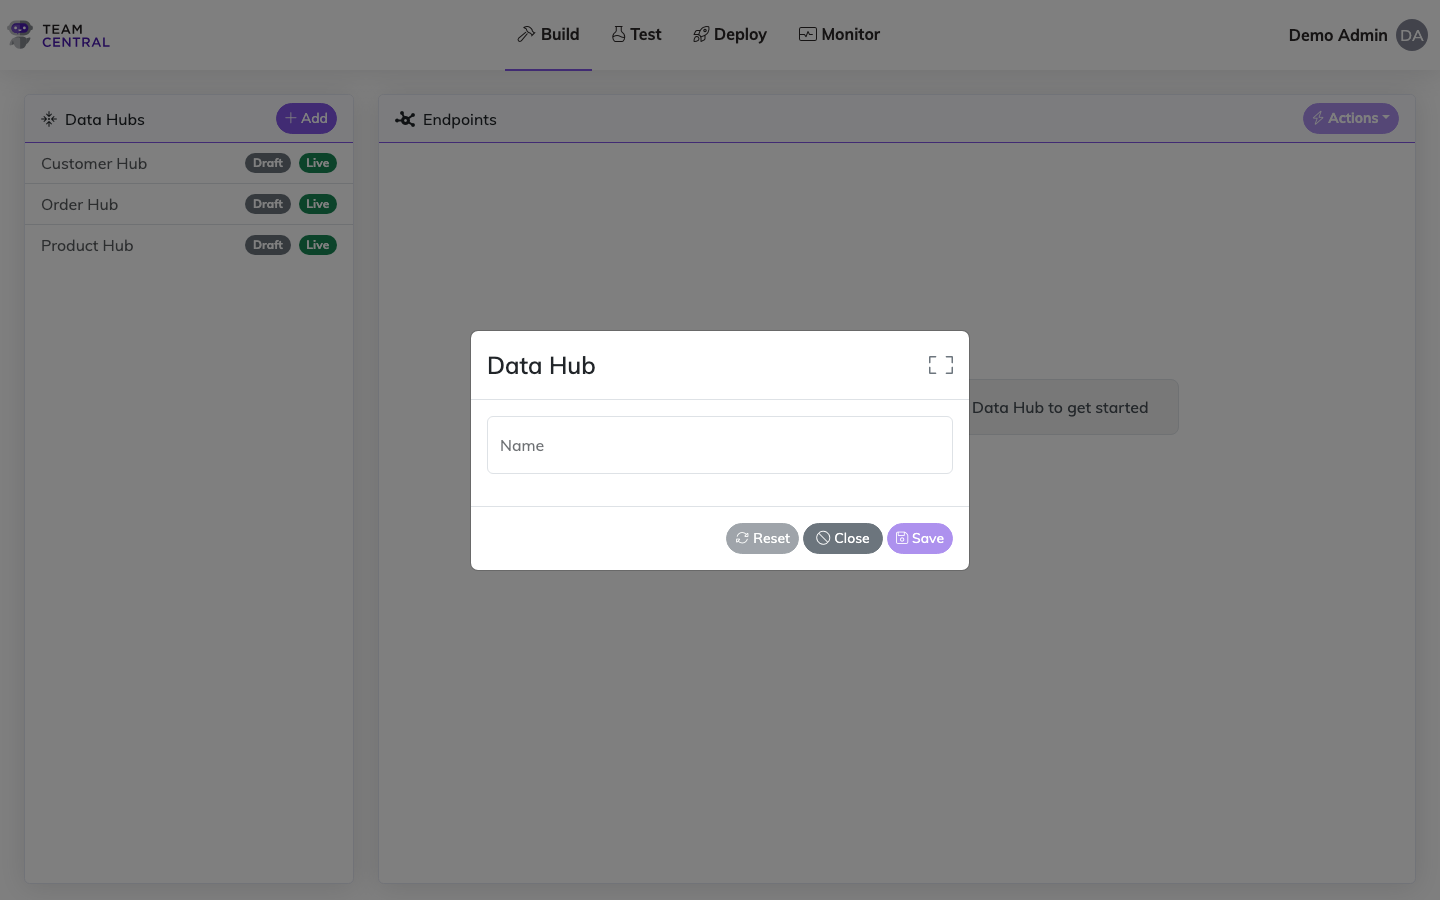
- Select Build > Data Hubs from the main menu.
- Select + Add.
- Enter a Name for the new Data Hub.
- Select Save.
INFO
- When a new Data Hub is created, it is saved as a Draft version until deployed.
- Once a Data Hub is created, you can select the edit icon to rename it if needed.
Add Endpoints to a Data Hub
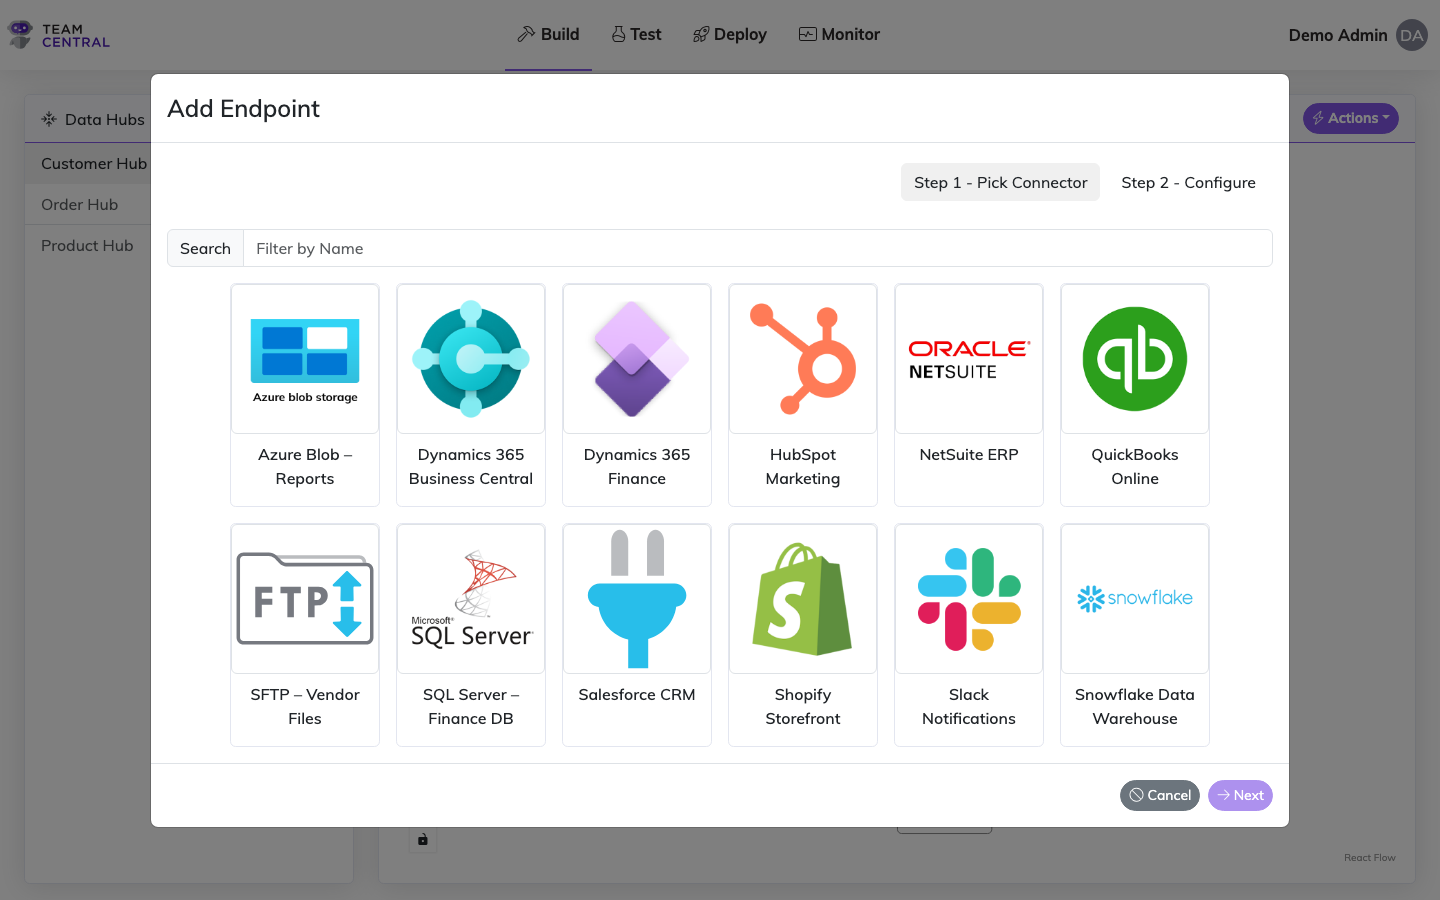
- Select Build > Data Hubs from the main menu.
- Select the appropriate Data Hub in the left column.
- Select Actions > Add Endpoint.
- Select the appropriate Connector.
- Select Next.
- Then, use the guidance below to configure the endpoint using a template or manually.
Best Practice
It is common to have multiple Transaction Types in the same Data Hub; however, it is best practice to keep all of the endpoints that are publishing and subscribing to the same Transaction Type grouped within the same Data Hub. See the Data Models section for additional information about Transaction Types.
Using a Template
Templates provide pre-configured mapping for some of the more common schema relationships for the selected endpoint and associated action. They are available for commonly built syncs (e.g. a Customer sync for NetSuite). If a template is available, it is strongly recommended to use one.
INFO
If a template is not available for the selected connector, you will not see the Use Template toggle. You will need to manually build the endpoint settings and mapping.
- Toggle Use Template ON.
- Select a Template from the drop-down menu. Once selected, a template description will appear below the menu.
- Select a Schema from the drop-down menu (or select Create New Schema).
- Select a Transaction Type from the drop-down menu. This drop-down is dependent on previous selections and will only appear once you click inside the field. If Create New Schema is selected, you will need to enter a new Transaction Type in the field.
- As needed, toggle Customer Endpoint Host ON, then select a Host Type Extension from the drop-down menu.
- Select Save.
TIP
When using a template, you can select Show Changes to open a sliding panel showing the list of data models included in the template, including the individual schema properties. Select Close to close the panel.
Configuring Manually
- Enter an Endpoint Name. This field is simply a displayed label in the design view.
- Select an Endpoint Type from the drop-down menu. See the Endpoint Types section below for descriptions.
- As needed, select a File Type. This field is only applicable for file-based connectors (e.g. FTP sites or local storage). See the File-based Endpoint Encoding Types table below.
- Select a Schema from the drop-down menu.
- Select a Transaction Type from the drop-down menu. This drop-down is dependent on previous selections and will only appear once you click inside the field.
- As needed, toggle Customer Endpoint Host ON, then select a Host Type Extension from the drop-down menu.
- Select Save.
Repeat this process to add as many endpoints as needed to a Data Hub.
Endpoint Types
INFO
- A single-direction endpoint creates either a save action or a read action (e.g. Publish creates only a read action, while Subscribe creates only a save action).
- A bi-directional endpoint creates both a save and read action.
- When a save action is created, an interaction to the Key is automatically created.
- A Webhook is a specific type of publishing endpoint where data is pushed from the connector to Central. Only certain vendors support this capability.
- Data Provider is used when creating API Gateway endpoints and should not be selected when working within a Data Hub.
| Endpoint Type | Description |
|---|---|
| Batch Publish | Publishes a group of transactions together. |
| Batch Subscriber | Receives a group of transactions to be processed together. |
| Batch Subscribe Messages | Receives a group of messages and batches them together. It enables a publisher to run on a normal schedule; then, a subscriber can batch process the messages as needed (while other systems may get minute-to-minute updates). This is common in file-based protocols. |
| Both | Publish and subscribe the transaction. |
| Both with Webhooks | A bi-directional endpoint where the publisher is implemented using Webhooks. |
| Data Provider | A read-only endpoint used in the API Gateway. It is not intended to be used inside of a Data Hub. |
| Delete Publisher | A publishing endpoint specifically used to publish records to be deleted or inactivated across systems. |
| Publish | Triggers the publishing of data to be consumed by other systems that are listening for a particular Transaction Type. |
| Publish with Webhooks | A publisher that is implemented with Webhook capability. |
| Subscribe | Triggers the subscribing of data by systems listening for a particular Entity Type and Transaction Type. |
File-based Endpoint Encoding Types
When configuring a file-based endpoint (e.g. FTP or local storage connectors), you must select an encoding type for the file.
| Encoding Type | Description |
|---|---|
| UTF-8 | Supports Unicode characters, while being backward compatible with ASCII. |
| UTF-8 (with BOM) | Supports Unicode characters, while being backward compatible with ASCII, including the BOM (Byte Order Mark). The BOM is a special character sequence placed at the beginning of the file to indicate the file is encoded in UTF-8. Some systems require the BOM to know what encoding to use for the characters. |
Endpoint Settings
Each endpoint has a Settings tab where you can configure processing behavior, including receipt replication, key source overrides, change tracking, parallelism, supported operations, and engine behavior flags.
For full details on all available settings, see the dedicated Endpoint Settings page.