Appearance
Scheduling & Automation
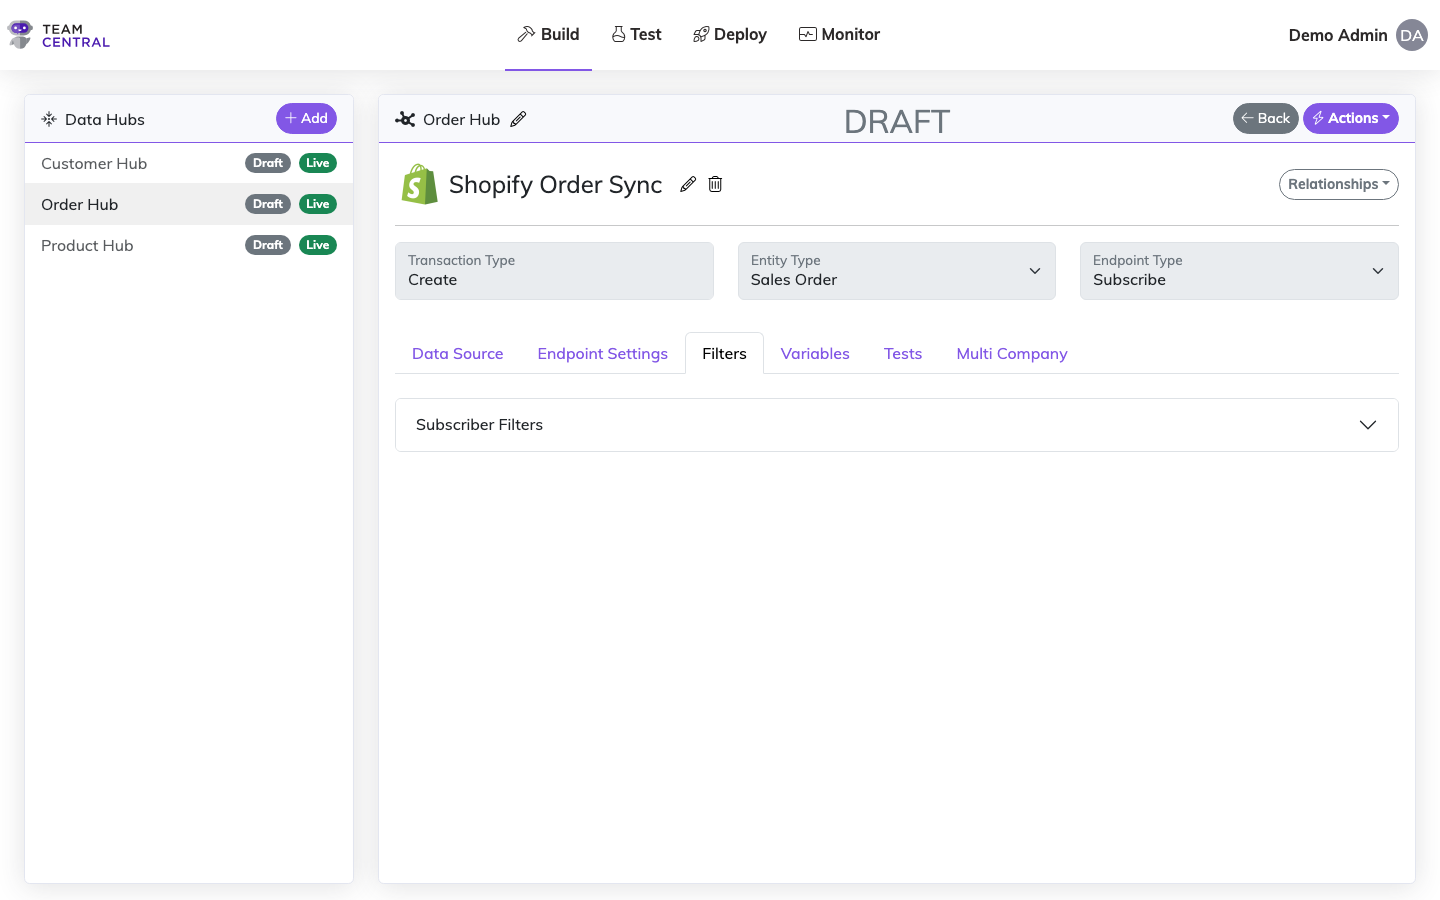
Publish/Subscribe Filters
A Publish or Subscribe Filter enables you to create rules to build complex scenarios to determine what data gets published. You can create individual filters, as well as groups of filters; and then configure And/Or conditions at both the Group- and Item-level, as well as across groups and items.
For Publish Endpoints, some connectors like Salesforce, Microsoft, and NetSuite have powerful query capabilities inside of the API to perform complex filter logic at the API level; other Connectors do not have this capability. A Publishing Filter can be used to filter the payload that has been downloaded by a Connector, manipulating what data is published.
For Subscriber Endpoints, it allows an Endpoint to receive a message, but not process it based on the data that is received on the message.
- Publishing Filter: Uses JSONPath or XPath to select a field from the Connector to use a comparison in the filter. (This is the same syntax as on an XML Simple Element Read mapping.)
- Subscriber Filter: Uses JSONPath to select a field from your Schema to use as a comparison in the filter. For example, to filter on a customer data value, use a JSONPath such as
CustomData[?(@.Name == 'Subscription3TimesRenewed')].Value.
NOTE
For additional help executing this functionality, contact TeamCentral Support.
Map Group Filters
In addition to Publish/Subscribe Filters (which apply at the endpoint level), you can also configure filters directly on individual Map Groups within your action mappings. Map Group filters control which items are processed during mapping — for example, skipping certain line items on a save. See Map Group Filters for details.
Configure Filters
Select Build > Data Hubs from the main menu.
Select the appropriate Data Hub; then, select the appropriate parent Endpoint.
Select the Filters tab.
As needed, select the arrow to expand the Publishing Filters or Subscriber Filters section.
Then, use the below table to determine next steps:
NOTES
- If no filters have been previously defined, select the Add One button in the center of that section.
- The Group name will be set as PublishingFilter or SubscriberFilter and cannot be edited.
- When creating a new Filter, you will need to first Create a New Filter Group; then, Add a New Item to that filter group.
| To: | Do this: |
|---|---|
| Create a New Filter Group | Select + Add Group. Select an option for Group And/Or, Item And/Or, and Subscriber Process Stage (subscriber filters only). Then, select Save. |
| Add a New Item | Select the + icon in the grey header row of that Filter Group. Enter or select data for the presented fields (the fields will vary based on your initial selections). Then, select Save. Repeat this process to add as many Items to that filter Group as needed. |
| Edit a Filter Group | Select the edit icon in the grey header row of that Filter Group. Edit the necessary fields and select Save. |
| Edit an Item | Select the edit icon in the appropriate item row. Edit the necessary fields and select Save. |
| Delete a Filter Group | Select the delete icon in the grey header row of that Filter Group. Select OK to confirm. |
| Delete an Item | Select the delete icon in the appropriate item row. Select OK to confirm. |
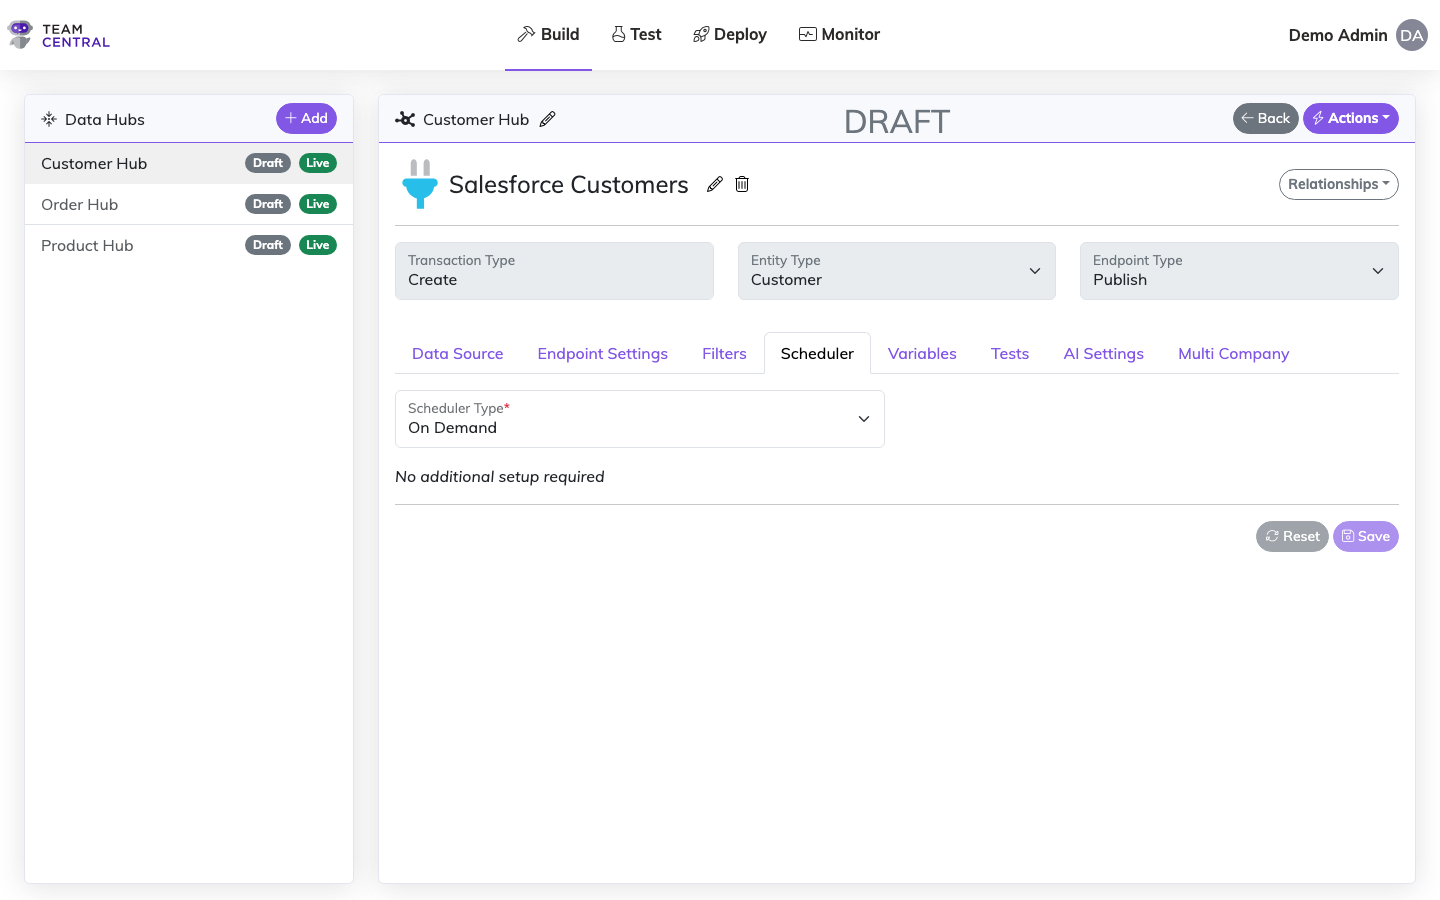
Scheduler
A Scheduler is available as a Publisher option only, and can be applied to schedule when data gets published.
There are several ways to schedule the data to be published:
- On Demand — Runs manually when the user decides to run.
- Interval — Runs on a specific frequency based on Minutes and Seconds.
- Day of the Week — Runs on specific days of the week based on Time Zone, Days of the Week selected, Time (Hours and Minutes).
- Day of the Month — Runs on specific days of the month based on Time Zone, Days of the Month, Time (Hours and Minutes), Run Conditions (Any Day, Week Day Only Advance, Week Day Only Skip, Week Day Only).
Best Practice
When a Scheduler has been applied to an Endpoint, the corresponding scheduler icon (shown above) will appear on the Endpoint card within the Data Hub. Users can select to manually publish the Endpoint as needed, but it is advised to allow the scheduler to run as prescribed. This will help to avoid any duplicates and/or errors.
Configure a Scheduler
Select Build > Data Hubs from the main menu.
Select the appropriate Data Hub; then, select the appropriate parent Endpoint.
Select the Scheduler tab.
Then, use the below table to determine next steps:
| To: | Do this: |
|---|---|
| Create an On-Demand Schedule | No additional set-up is required for On-Demand scheduling. |
| Create an Interval Schedule | Select the Scheduler Type: Interval. Enter the Minute and Second times. Then, select Save. |
| Create a Day of the Week Schedule | Select the Scheduler Type: Day of the Week. Select a Time Zone. Select Add Time. In the pop-up window, select the appropriate day(s) and enter a Time; then, select Save. The schedule will appear in the scheduler table. Repeat this process to create as many schedules as needed. When finished, select Save below the scheduler table to save all of the created schedules. |
| Create a Day of the Month Schedule | Select the Scheduler Type: Day of the Month. Select a Time Zone. Select Add Time. In the pop-up window, select the appropriate date(s), enter a Time, and select a Run Condition; then, select Save. The schedule will appear in the scheduler table. Repeat this process to create as many schedules as needed. When finished, select Save below the scheduler table to save all of the created schedules. |
| Edit an Interval Schedule | Repeat the Create an Interval Schedule steps. |
| Edit a Day of the Week/Month Schedule | Select the appropriate Scheduler Type: Day of the Week/Month. Select the edit icon in the appropriate row. Edit the Schedule as needed; then, select Save. |
| Delete a Day of the Week/Month Schedule | Select the delete icon in the appropriate row. Select OK to confirm. |
Run On-Demand
When a publisher is set to On Demand, the endpoint can be executed by either clicking the icon on the endpoint card, or clicking the ellipsis and selecting Run Publish.
This will bring up a dialog box that allows the user to select the date and time they would like the publisher to run from, along with a couple of toggle options described below.
On-Demand Options
| Option | Description |
|---|---|
| Bi-directional Blocking | Blocking checks are background actions that may prevent a record from being run back-to-back or too often. If Skip Blocking is turned ON, the system will ignore any blocking checks within the system. Toggle Skip Blocking ON or OFF as needed. |
| Customize Request | This is a one-time audit of the configured Endpoint. In this screen, you can modify the requests (e.g. change the route, designate a filter, etc.) and then run the modified configuration. When finished, the system will reset to the default settings once you close this window. Toggle Customize Request ON or OFF as needed. |
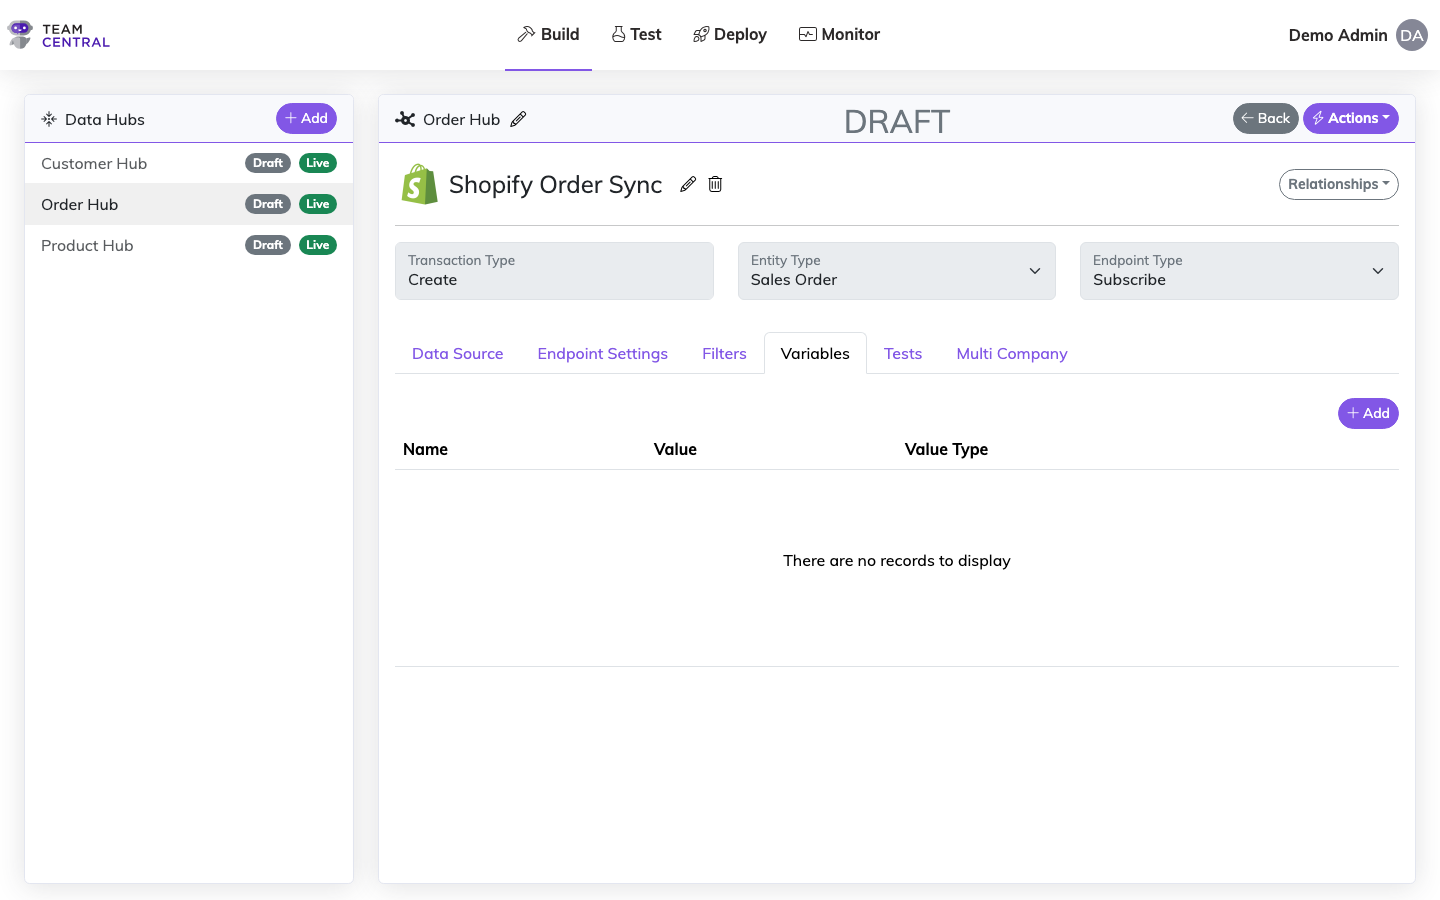
Variables
Variables enable you to create values that can be passed into the action and used as parameters for a URL or message body. For custom Endpoints, variables can be used as constants that can be referenced in code as an application setting.
NOTE
For additional help executing this functionality, contact TeamCentral Support.
Configure Variables
Select Build > Data Hubs from the main menu.
Select the appropriate Data Hub; then, select the appropriate parent Endpoint.
Select the Variables tab.
Then, use the below table to determine next steps:
| To: | Do this: |
|---|---|
| Create a New Variable | Select + Add. Enter a Name and Value; then, select a Value Type. As needed, toggle Use Generated Value ON; then, enter or select data for those fields, which will vary based on your selections. Then, select Save. |
| Edit a Variable | Select the edit icon in the appropriate row. Edit the necessary fields; then, select Save. |
| Delete a Variable | Select the delete icon in the appropriate row. Select OK to confirm. |
TIP
Variables can be referenced in endpoint action URLs and bodies using parameterized syntax. See Endpoint Configuration for details on the {VAR:Name} syntax.
Drop-Down Lookups
Drop-down Lookups are a specific type of cross-reference within Central, and are confined to a single Data Hub. They are typically associated with Foreign Keys that do not fit into a particular entity type on the Common Model, so they are classified as General System Lookups.
When a key is received by the mapping engine for a particular value, it goes to the list of Drop-Down values that match the value for that system. Then, it uses the name of the Drop-Down value to pull in all other Drop-Down values that match that name.
Example
You have an office location in Northwest Illinois. In Salesforce, that data might be written as NW-IL; however, in HubSpot, it may be written as a random string, 779f26-ghn11-ec145. You can build a Drop-Down Lookup to manage the cross-reference of this data.
A few important callouts on Drop-Down Lookups:
- The name of the Drop-Down field must match the name of the Foreign Key on your Schema.
- Drop-Downs are scoped (limited) to a specific Data Hub.
- An item inside of a Drop-Down list includes the name of the system, the name of the drop-down, and the value of the drop-down.
- The mapping engine uses the name and the system values of each Drop-Down item for the cross-reference.
Configure Drop-Down Lookups
Select Build > Data Hubs from the main menu.
Select the appropriate Data Hub; then select Actions > Manage Drop Downs.
NOTE
You can select Actions > Manage Drop Downs from within an Endpoint as well.
Then, use the below table to determine next steps:
WARNING
- When initially creating Drop-Down Lookups, you will need to Create a New Drop-Down Field; then, Add A New Value.
- Additionally, after each step (creating the field, adding values, etc.), you must select Save at the top of the screen.
| To: | Do this: |
|---|---|
| Create a New Drop-Down Field | Select an Entity Type. Select Add One. Enter a Field Name. Select Save. |
| Add a New Value | Select the appropriate Entity Type and Drop Downs Field. Enter appropriate text in the Name field. Select the appropriate System from the drop-down list. Enter appropriate text in the Value field. Select + Add. Repeat this process to add as many values as needed. Select Save. |
| Designate a Default Value | Select the appropriate Entity Type and Drop Downs Field. Select the Is Default checkbox for the appropriate Value. Select Save. |
| Edit a Drop-Down Field Name | Select the appropriate Entity Type and Drop Downs Field. Edit the Field Name; then, select Save. |
| Delete a Drop-Down Field | Select the appropriate Entity Type and Drop Downs Field. Select Delete. Select Yes to confirm. |
| Delete a Value | Select the appropriate Entity Type and Drop Downs Field. Select the delete icon in the appropriate row. Note: You will not be prompted to confirm the deletion of a Value. |
See Also
- Endpoint Settings — Configure processing behavior and supported operations
- Endpoint Configuration — Configure endpoint action inputs and parameterization
- Data Adaptation — Transform data as it flows between systems
- Building Data Hubs — Create Data Hubs and add endpoints