Appearance
Connectors
Connectors give Central the necessary security settings to interact with specific software systems such as Dynamics 365 or Salesforce. You'll need to designate both a method and a protocol for each Connector. A method is how the Common Model interacts with the connected system (e.g. Get, Put). A protocol is the data format that the API supports (e.g. JSON, SQL, XML).
Key Features
- Multiple System Support — Connect to REST APIs, SQL databases, SFTP servers, Azure Blob Storage, and more
- Authentication Types — Multiple methods, including Basic and OAuth variants. See Authentication Methods for the full list.
- Secure Storage — Credentials and secrets are stored securely and never exposed in the UI
- Company Scoping — Associate connectors with specific companies for multi-tenant setups
TIP
Since connectivity is pre-built in Central, there is no need to use Postman. Simply use the Test Connector to write test requests and check responses.
WARNING
Have the authentication information from each vendor associated with the connections you plan to implement before starting. For links to common vendor documentation, see the Connectors Catalog.
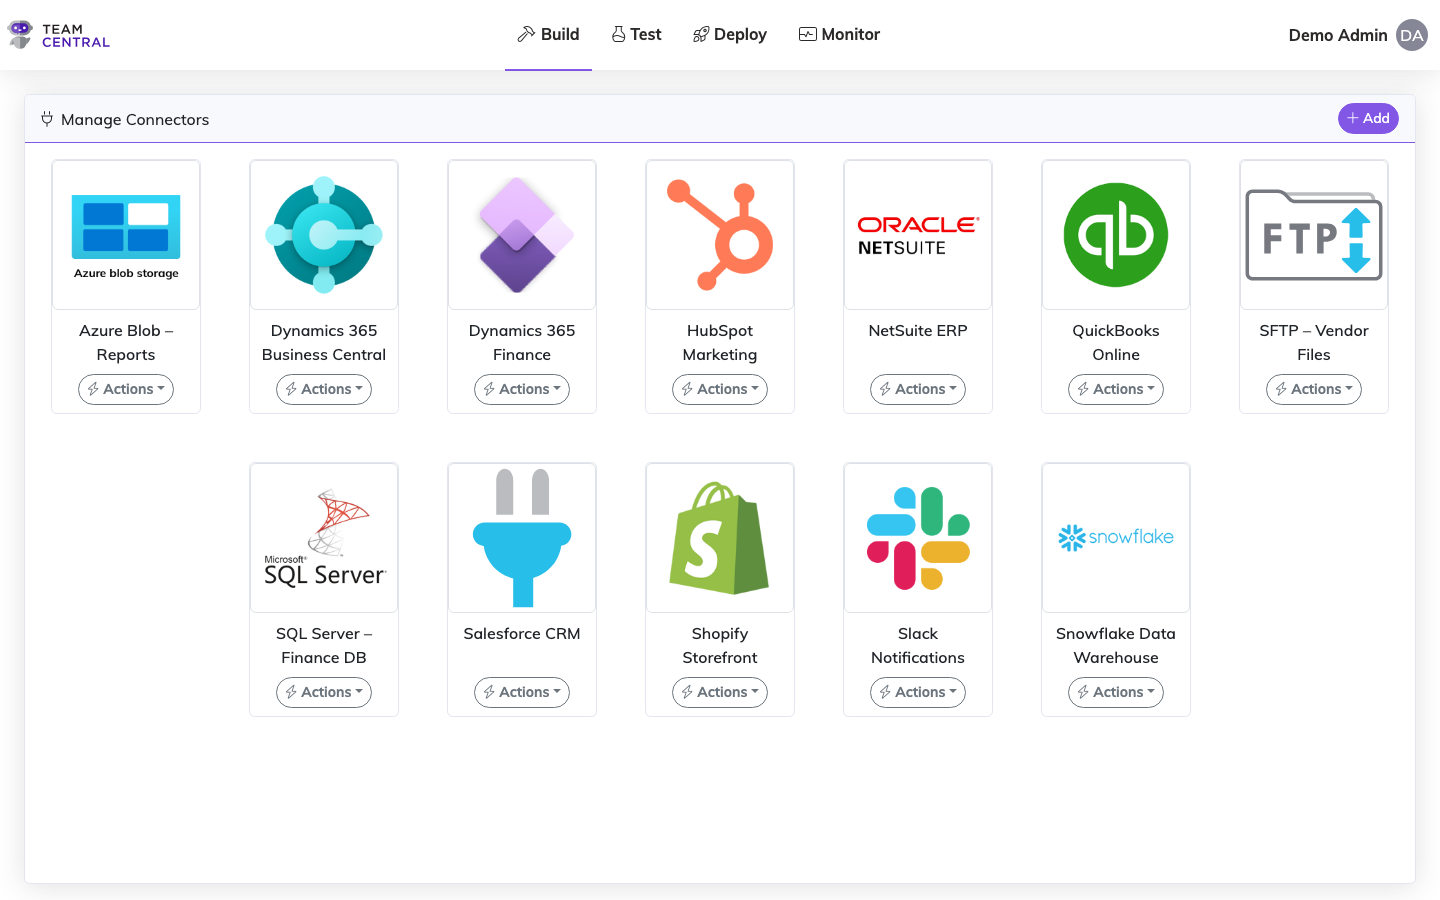
Add a New Connector
Select Build > Connectors from the main menu.
Select + Add.
Select a Connector from the list.
Select Next.
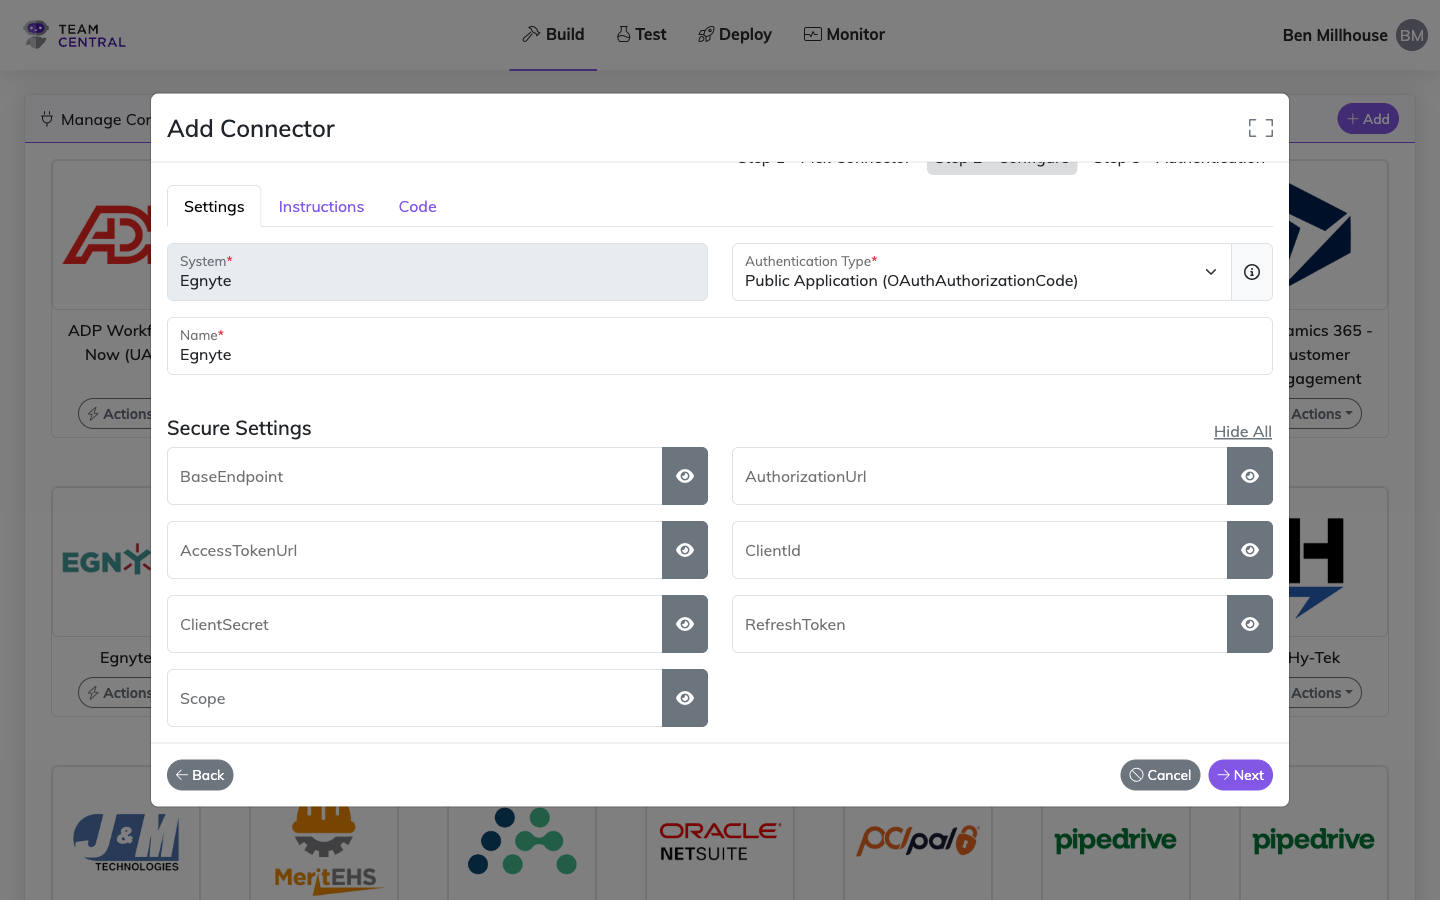
As needed, enter a new Name for the Connector.
If the connector supports more than one authentication method, choose one from the Authentication Type dropdown. The list of Secure Settings will adjust to match the selected method. Select the info icon next to the dropdown for a short description of the active method.
TIP
Common credentials (such as ClientId or ClientSecret) carry over when switching between methods, so you can pivot during setup without re-entering shared values.
- Enter the Secure Settings information.
WARNING
The data entered for all Secure Setting fields must match your system's specific security details. This information can typically be found in the Admin settings of the system you are trying to connect.
TIP
Secure setting fields will vary by Connector and by the selected Authentication Type. To view entered data, toggle the View/Hide icon in each entry field, or select Hide All or View All.
- Select Save. The Connector will now appear on the Manage Connectors screen.
Edit a Connector
Select Build > Connectors from the main menu.
Select Actions > Edit in the appropriate Connector card.
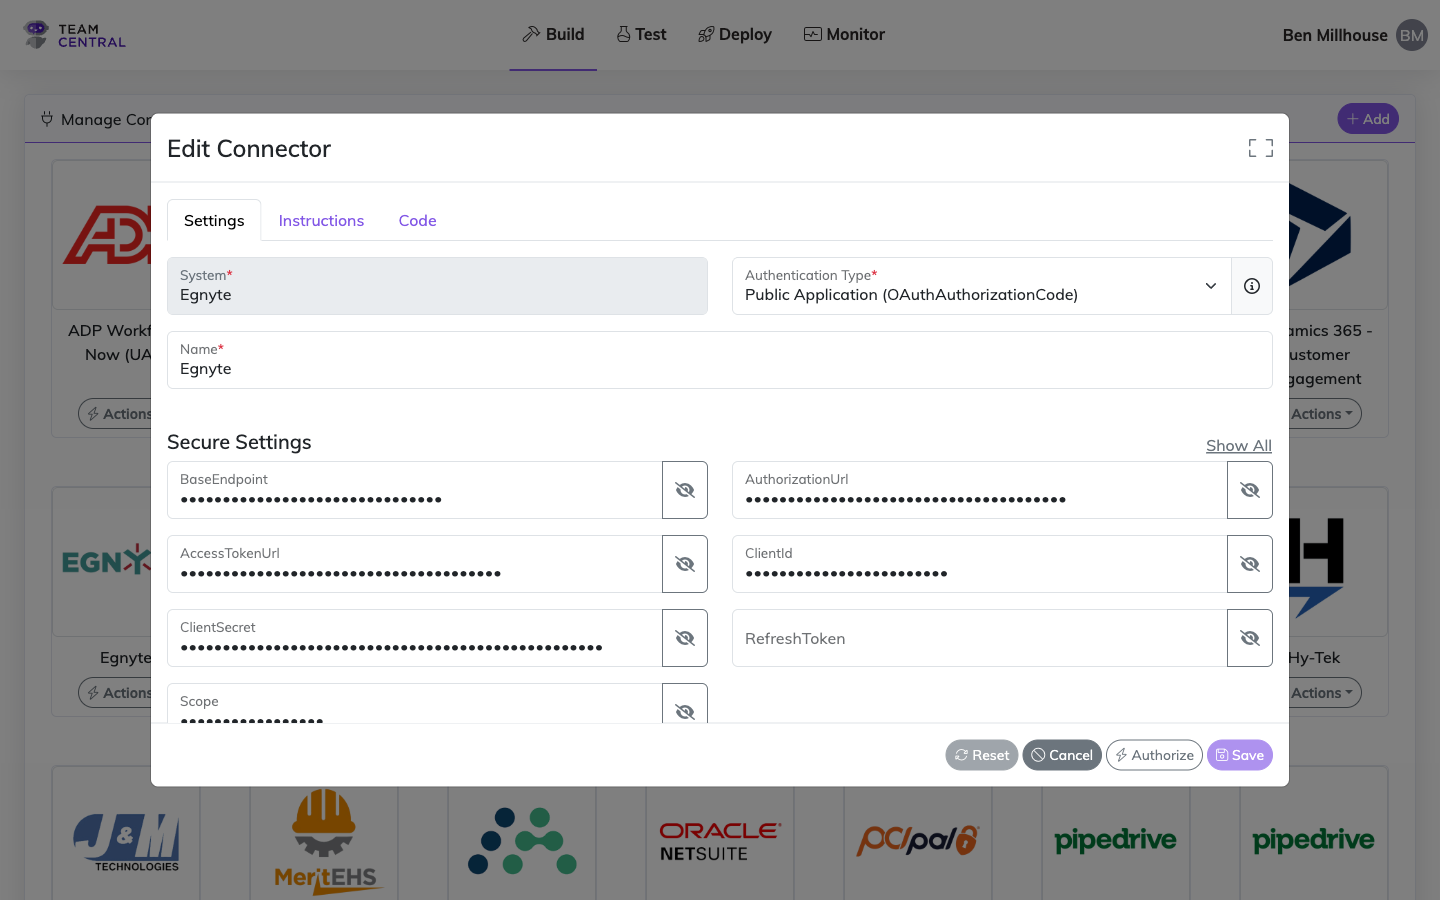
- Modify the Connector Name and/or Secure Settings.
TIP
For connectors that support multiple authentication methods, you can change the Authentication Type here as well. Values you've already entered for credentials shared between methods (e.g., ClientId, ClientSecret) are preserved when you switch.
TIP
To discard all changes and start over, select Reset. To discard all changes and exit edit mode, select Cancel.
- Select Save.
Additional Instructions
The Instructions tab on the Edit Connector dialog lets you add request instructions that apply to every outgoing call this connector makes — useful for setting custom HTTP headers, query parameters, or time-zone conversion of the LastRun timestamp without modifying every endpoint individually.
Select Build > Connectors from the main menu.
Select Actions > Edit in the appropriate Connector card.
Switch to the Instructions tab.
Select + Add Instruction and choose an instruction type:
- Header / String Value — set an HTTP header, query parameter, or body field. Choose a Target, then enter a Key and Value (e.g.
Header/Accept-Language/en-US). - Time Zone Conversion — shift the LastRun timestamp into a chosen IANA time zone (e.g.
America/New_York) before it gets injected into parameters such as{SYS:DateLastPolled}. See Time Zone Conversion for details on when to use this.
- Header / String Value — set an HTTP header, query parameter, or body field. Choose a Target, then enter a Key and Value (e.g.
Select Save in the dialog, then Save on the connector.
TIP
A common use case is forcing a culture or region header on every request. For per-endpoint overrides (e.g. a different Prefer value on a specific Read), use Additional Instructions on the endpoint action instead.
WARNING
If the same header name (e.g. Prefer) is set both at the connector level and on a specific endpoint action, the endpoint-level value replaces the connector-level value entirely for that endpoint — including any other values for the same header. If you need to keep a connector-wide preference alongside an endpoint override, restate it explicitly on the endpoint.
Copy Webhook URL
For webhook-enabled connectors, you can copy the webhook URL directly from the connector card.
Select Build > Connectors from the main menu.
In the appropriate Connector, select Actions > Copy Webhook URL.
The webhook URL is copied to your clipboard. A success notification will confirm.
TIP
The Copy Webhook URL action only appears for connectors that support webhooks (e.g. Shopify, HubSpot). If your connector does not support webhooks, this option will not be visible.
Delete a Connector
Select Build > Connectors from the main menu.
Select Actions > Delete in the appropriate Connector card.
Select OK to confirm the deletion.
WARNING
Deleting a Connector cannot be undone; you must recreate it if needed.
Connect a Connector
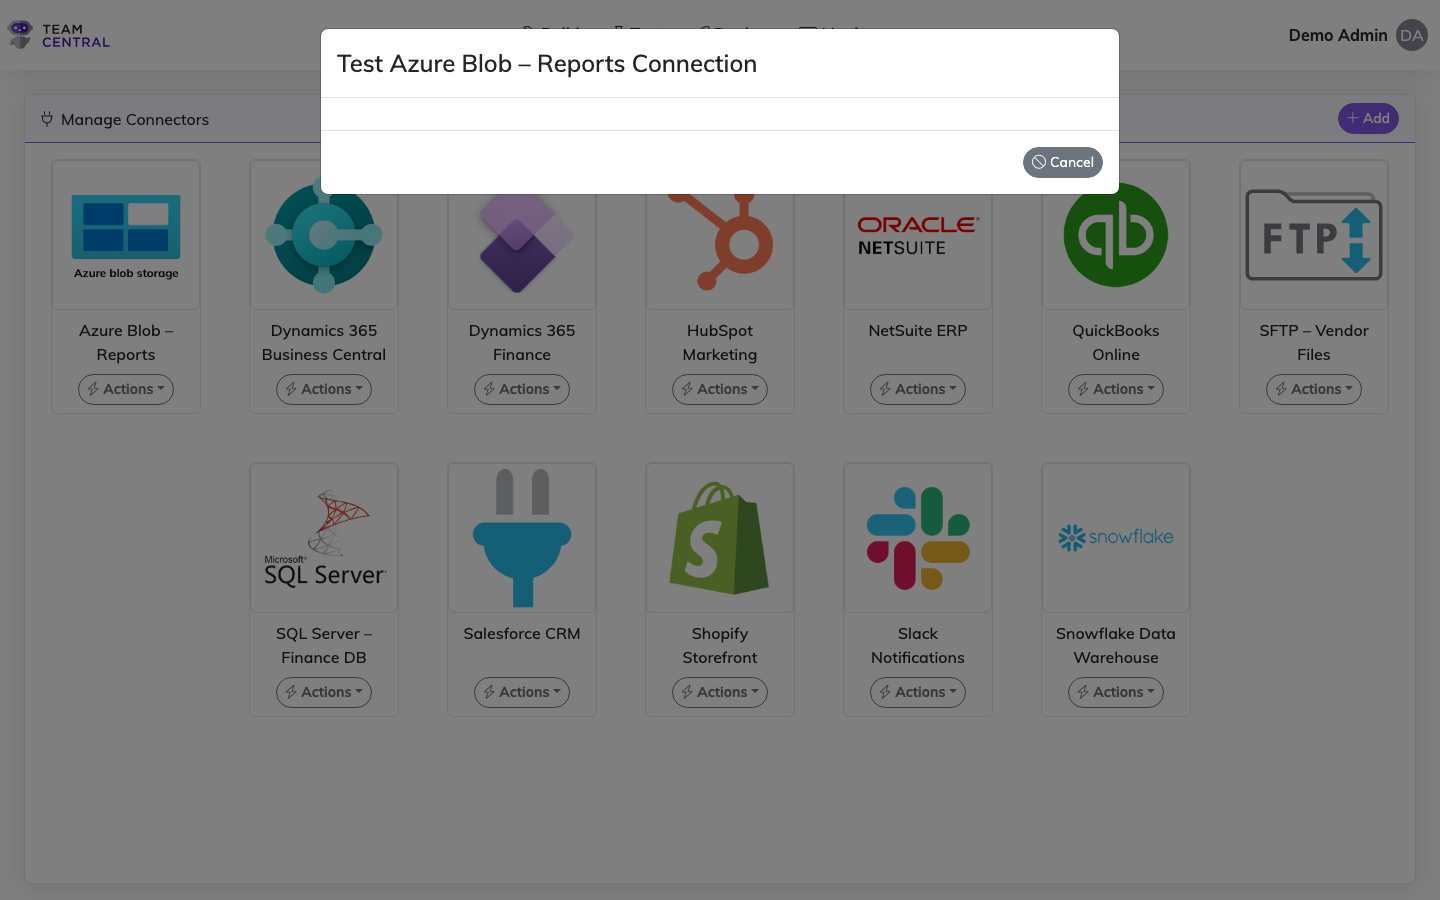
Select Build > Connectors from the main menu.
In the appropriate Connector, select Actions > Connect.
The Test Connection window will appear. The system will attempt to connect to ensure the secure settings are operational; once successful, the connection details will be displayed.
WARNING
If an error occurs while trying to connect, a pop-up notification will disclose details as to why the connection failed. Select the X to close the error window.
- When finished, select Cancel to return to the Manage Connectors screen.
Test a Connector
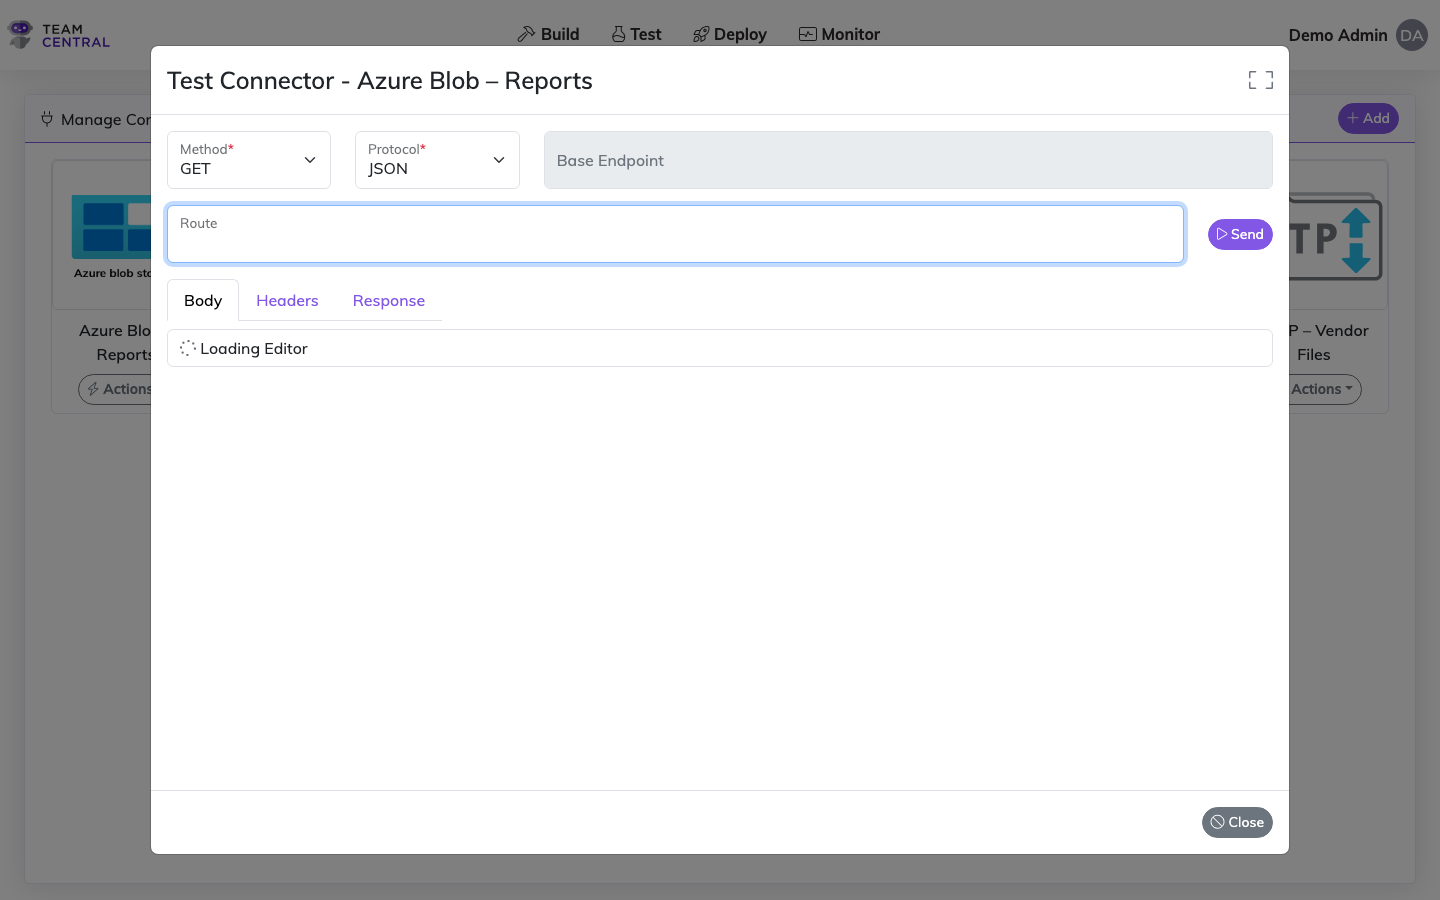
Select Build > Connectors from the main menu.
In the appropriate Connector, select Actions > Test.
Select a Method (e.g. GET, PUT, POST, DELETE).
Select a Protocol (e.g. JSON, XML, SQL).
Enter Route data (the API endpoint path).
Select Send.
The request will display on the Body tab; the response will display on the Response tab.
Select Close to exit the test window.
TIP
If needed, click on Headers to enter additional HTTP Header values or Key values for the request.