TOC
Definitions
CONNECTORS
A connector is a data source that can push and receive data on the Central Integraton Platform. Think of a connector as the foundation of the house, and everything else sits on top of it. We have a number of implementation options for connectors.
- Prebuilt connectors to many of the industry leading SaaS based products like Microsoft Dynamics and Salesforce
- Connectors to your company owned REST API’s, Relational Databases, or FTP locations
- Build your own connectors with the Central SDK
Data Hubs
A Data Hub is an implementation of what we call “event driven architecture”. What that basically means is inside of a Data Hub we have endpoints on each connector that can trigger an event. Think of these events in the context of activity within your business - “creating a sale”, “hiring a new employee”, “billing the customer”. We call the trigger for an event the publisher. In addition to the publisher you can configure connector endpoints that can listen and consume a particular event. We call these endpoints the subscribers.
A good example of a typical Data Hub is the automation of creating a sale where my CRM system may trigger an event that an Opportunity has been won (publisher) and my financial system would receive that event and generate a Sales Order (subscriber).
Workflows
A Workflow is different than a Data Hub in that it has a defined start and stop with specific logic that orchestrates actions to take. Workflows are an implementation of what we call “orchestration architecture”. Workflows on the Central Integration Platform are used in 2 main scenarios.
- Batch processing, where usually some sort of file triggers the workflow or is produced as a result
- Scenarios that require specific steps to be taken in a particular order that does not fit well into a Data Hub.
API Gateway
The API Gateway is the centerpiece of the Central Integration Platform. All of the data that flows through Central goes through the API Gateway. That includes all of the event messages triggered from Data Hubs and Workflows. It also includes two features we call Webhooks and Data Providers.
- Webhooks are endpoints that can receive an event from an external party. Webhooks can be used to receive an event from a commercial SaaS system. Webhooks are also a good way for external partners or vendors to send data into Central to trigger a Data Hub or Workflow.
- Data Providers give read/query access into all of your data sources from one spot. Data Providers are great for aggregating data from multiple sources to provide functionality to custom applications, intranet pages, low code products like Power Apps.
Endpoints
Each connector exposes what we call “Endpoints”. Endpoints are the basic capabilities exposed by a connector. Think of these capabilities as things like “Save a Sales Order”, “Query for recently changed Contacts”. We will go into much more detail about how endpoints are configured, but some of the basic uses are Data Hub publishers and subscribers, Workflow triggers and actions, and API Gateway Data Providers.
Version Control
We will go into more detail on version control in the Deployment Section, but as an introduction all configuration within Central is labeled based on which stage of the process it is in.
- Live - version that is running in production
- Draft - version that is currently in design/build phase
- Previous Deploy - version that was running in production at some previous point in time
Central Index
The Central Integration Platform is not just a “data mover” product. We are a full data management platform that is actively monitoring the health of your data. One of the key aspects in doing that is a feature we call the Central Index. Think of the Central Index as a master database that links and cross references all of the key pieces of information that run your business.
How is this helpful? A great example of that is a pretty typical automation we perform for generating Sales Orders in your financial system. A Sales Order can be a somewhat complex data structure. It has the basic information like the Order Date, but it also holds references to many other pieces of information spread across your business - Sales Rep, Customer, Region/Area of the Business the Order was placed for, Products/Services being purchased. The Central Index plays a large role in aggregating master data across systems so that when an automation like “Creating a Sales Order” is executing in your financial system all of those bits of information mentioned above can be set appropriately.
Connectors
Central supports really any type of data source: Web API’s, Databases, SFTP, etc. There are three main ways that we achieve this connectivity. The first is we have a library of prebuilt connectors for many popular SaaS products like Salesforce, Microsoft Dynamics, and Oracle Netsuite. The second is we provide the ability for customers to connect their own proprietary REST API’s, SQL Server Databases, and SFTP locations into Central. The third option is individual developers can use the Central SDK to build their own connectors for private use or to publish for the community.
Adding a Connector to your environment
From the Build menu you can select “Connectors” to manage all of the connectors for your particular environment.
From the manage connectors screen in the top right you can add a connector from our existing library or you can add your own custom connectors (more on adding your own custom connectors in the SDK section below).
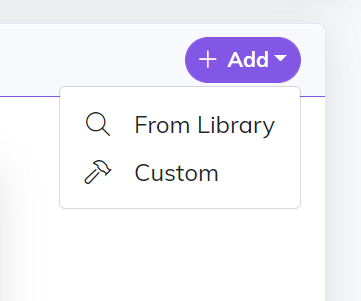
If you select “From Library” there is a simple two step process where you pick one of our existing connectors and then enter the details needed to connect to that particular endpoint.
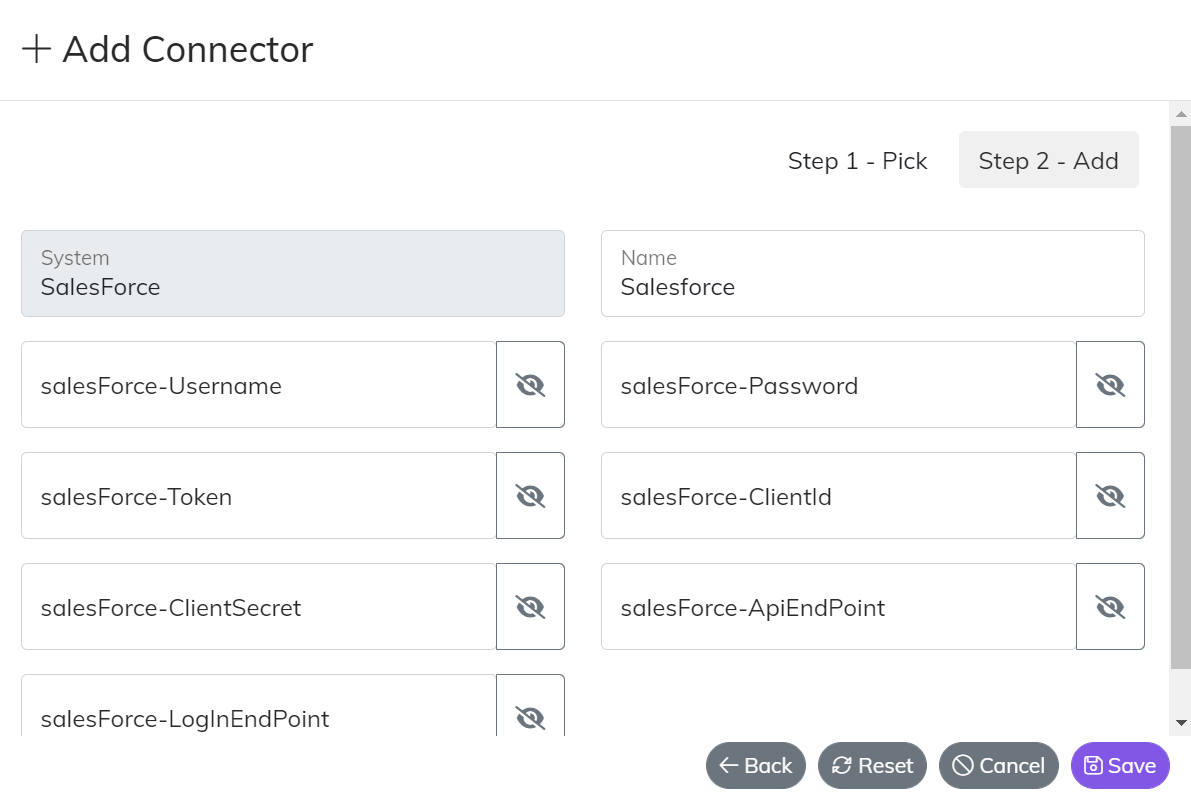
Below are detailed instructions for connecting to each data source in our library.
Managing an existing connector
Often time connectors need to be updated for a given situation i.e. API version upgrade, Password expiration, etc. You can change an existing connector by clicking the “pencil” icon on an existing connector. You can remove a connector as well by clicking the “trash” icon. Warning that deleted connectors will impact all integrations where that connector was included.

Data Hubs
Deciding how to design a Data Hub is largely determined by your requirements and your preferred way to logically organize your integrations. There is no right or wrong way to do it, but the suggested thought process is to group a particular type of data like “Customers” or a particular business process “Lead to Close”.
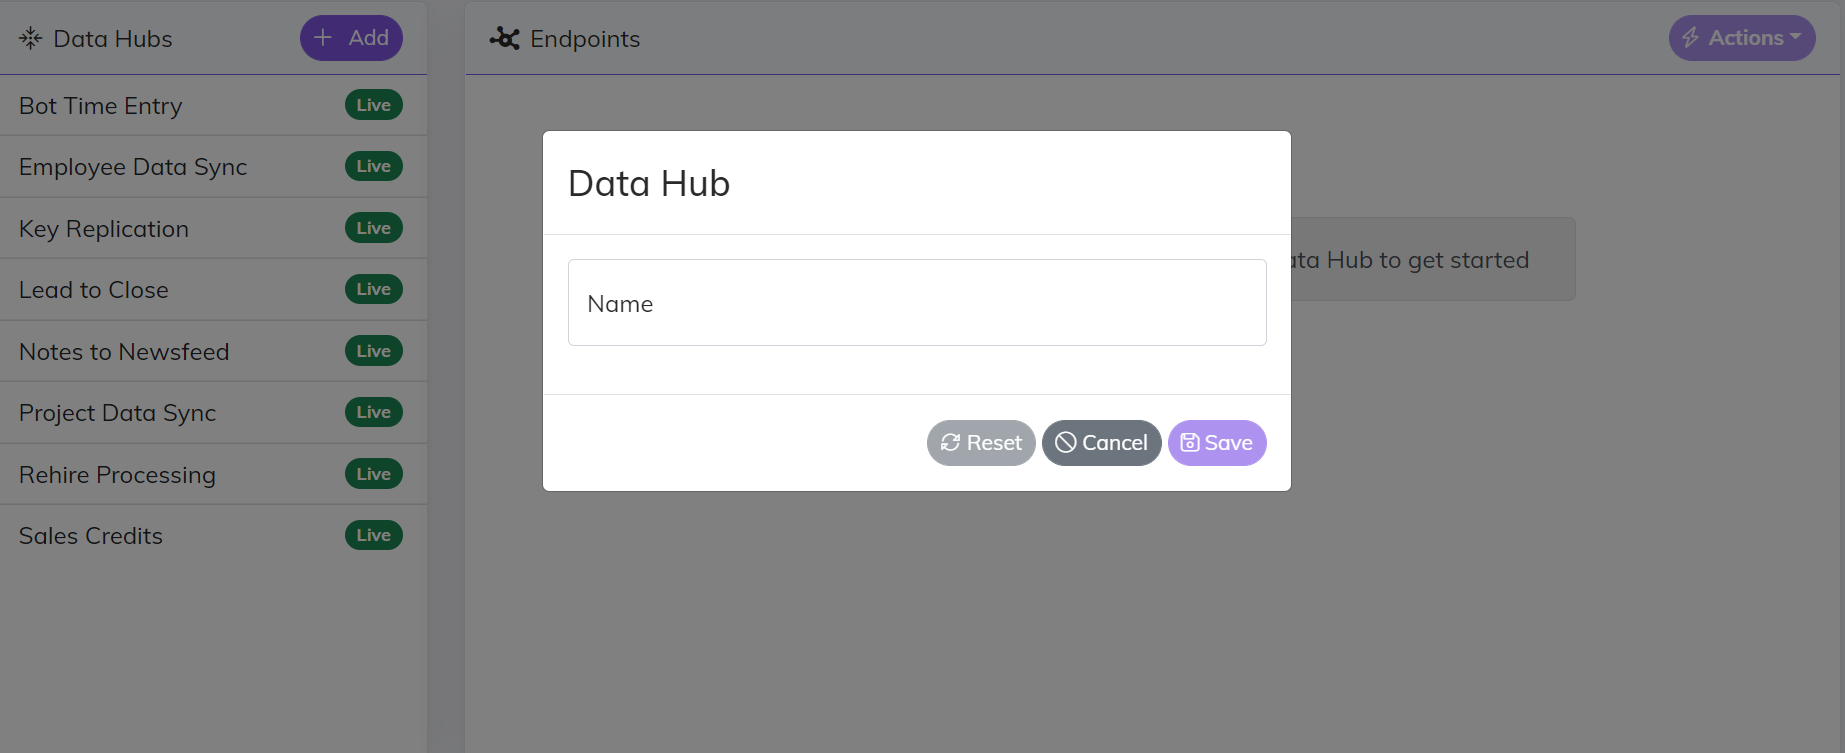
From the Build menu you can select “Data Hubs” to manage all of the Data Hubs for your particular environment. In the top left corner you can select “Add” to add a new Data Hub. All Data Hubs are created initially as Drafts and will not be flipped to Live until it is ready for production.
In the top right of the Data Hub design view is an “Actions” button. The actions button contains all of the functionality on a Data Hub.
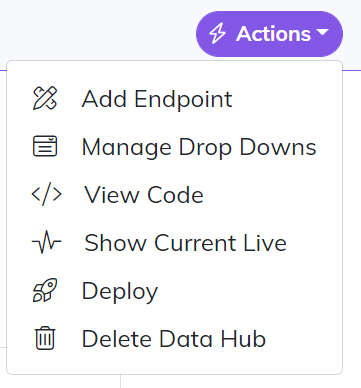
Add Endpoint
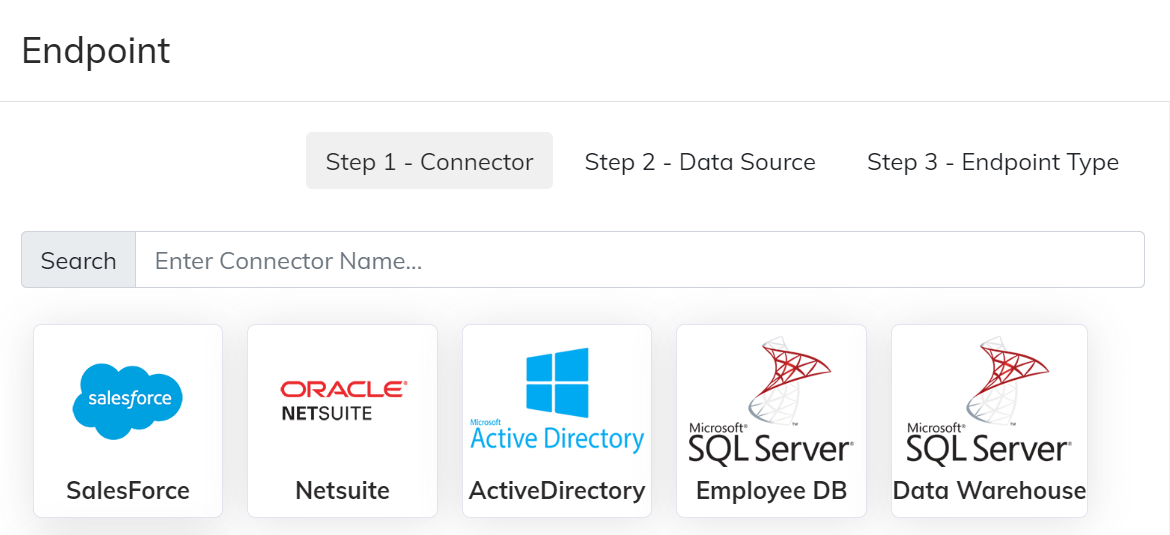
Adding an endpoint is a simple 3 step process.
- Select your connector - pick from the existing connectors you have configured
- Give the endpoint a name and select your data source - the data source is the type of data provided by the connector i.e. Customers, Orders, Invoices, Employees
- Pick the type of connector - for a Data Hub this is going to be publisher (pushes data), subscriber (receives data), both (bi-directional)
Manage Drop Downs
A Drop Down is a type of Cross Reference and Master Data Management capability within Central. Think of a scenario where you are synchronizing something like an Employee from your HRIS to your ERP, and part of that Employee data you want replicated into the ERP is the Job Title. A Drop Down allows you to store the values of that Job Title across your HRIS and ERP so that when that Employee record gets written to the ERP the correct Job Title Id is selected.
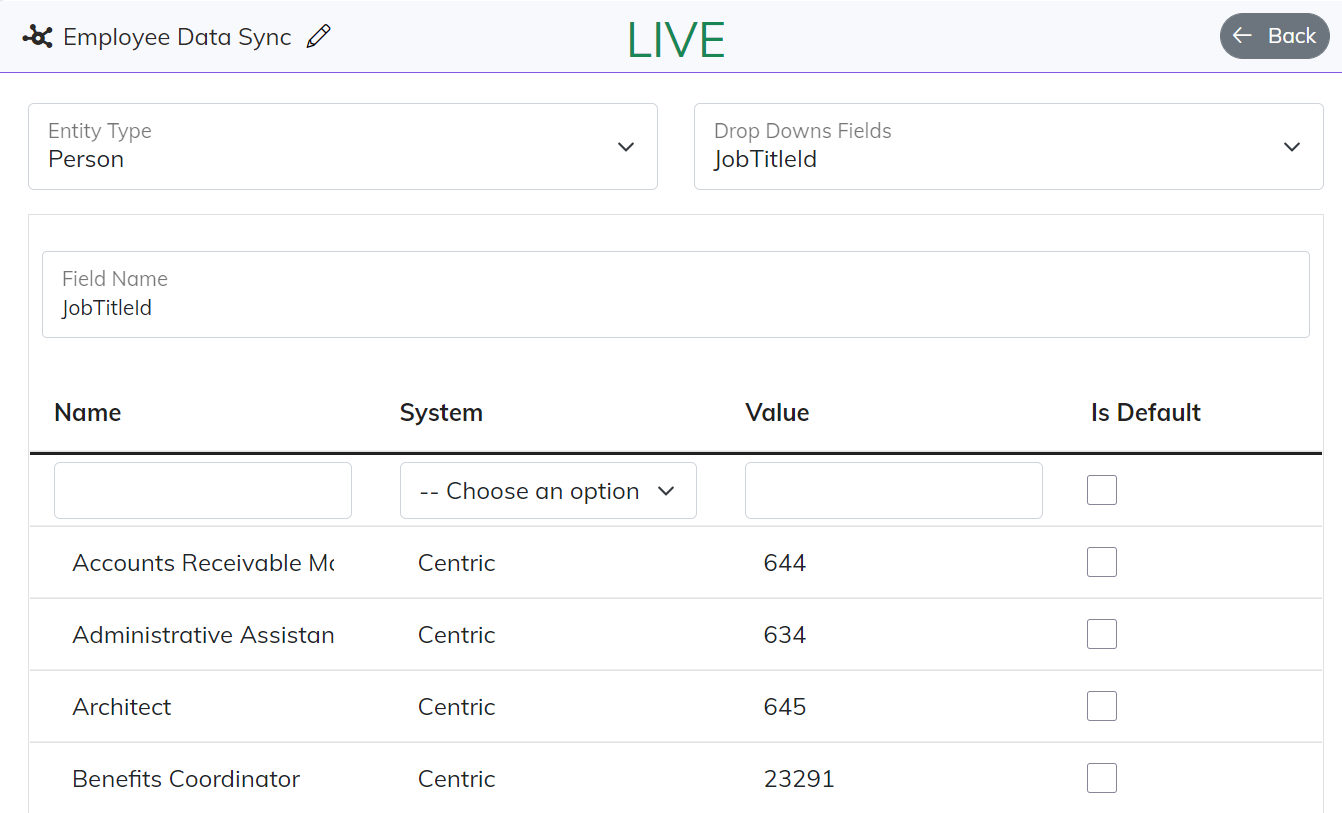
Each Drop Down value is name value pair just like what would show up in a “drop down” list in an application. The Name and System are used to match the correct value for the connector that is executing the logic.
Every Drop Down Field is associated inside the Data Hub with a particular Entity Type, which in this case for a Job Title is a “Person”. Also the Field Name of the Drop Down MUST have the same name as the Foreign Key field it is mapped to. More on field mapping below under Endpoint Configuration.
View Code
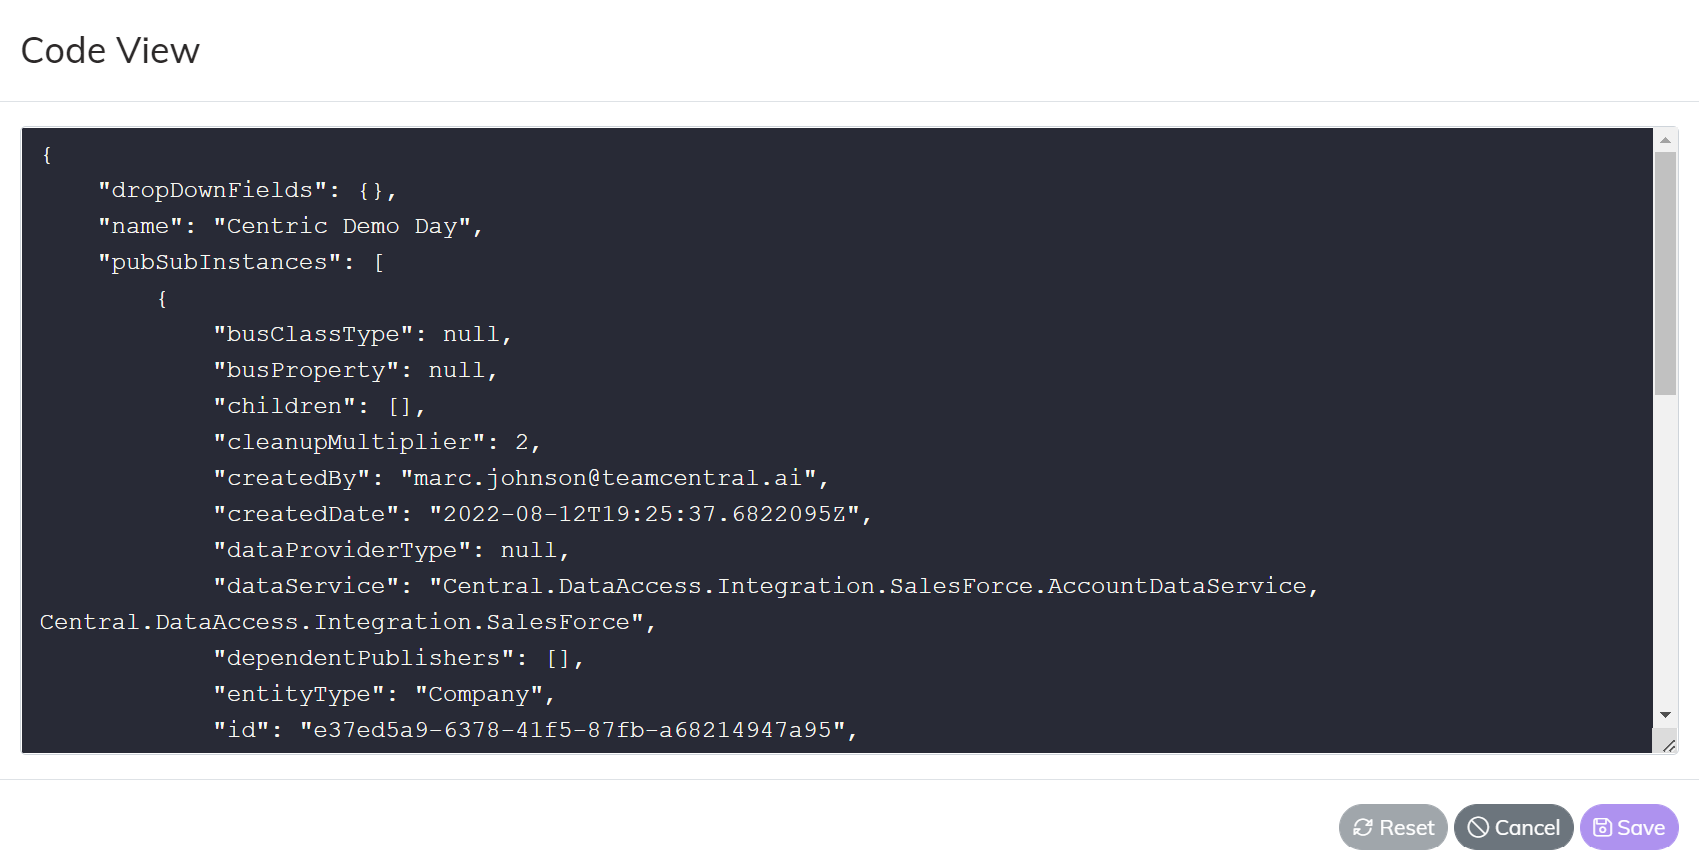
It is not actual code. Think of this as the configured instructions that you want your Data Hub to interpret and execute. The “View Code” capability allows you to see the raw JSON that the App is maintaining. View Code can also be used for more advanced platform features that we have not yet included in the UI.
View Current Draft/Live
If you have both a current Draft and Live version of the Data Hub this allows you to flip back and forth across both versions.
Deploy
If you are viewing a Draft version of the Data Hub you can deploy directly from the Build screens. This will do the same thing as deploying from the actual Deploy screens.
Delete Data Hub
If a Data Hub is no longer needed it can be deleted. If a Data Hub is accidentally deleted it can always be recovered by making a support request.
Workflows
As mentioned above in the definitions Workflows are used in two specific cases within Central.
- For batch oriented processing that usually requires some sort of file upload or download
- For automations that require a more structured or orchestrated set of steps that would not work well within a Data Hub.
It is important to note that currently the design view for Workflows only works with Scenario #1. If your use case requires Scenario #2 someone on the Central support team can assist in building that out.
There a 3 main constructs that make up a Central Workflow.
- Trigger - the event that starts a workflow, Triggers can fire based on a schedule or based on a real time event with a webhook
- Step - there are two types of Steps, General Steps are just a logical way to group Actions and organize your Workflow, Conditional Steps are a way to establish logic in your Workflow i.e. If This Then That
- Action - code that can be executed on a particular Connector End Point, there are 3 types of Actions, Save Actions can process a save much like a Data Hub and then save any keys back to the Central Index, Set Data Actions can mutate the data that is running through the Workflow adding additional data to it, Simple Execute Actions are actions that just fire and have not return value i.e. Send an Email, Execute a Power Shell script
From the Build menu you can select “Workflows” to manage all of the Workflows for your particular environment. In the top left corner you can select “Add” to add a new Workflow. All Workflows are created initially as Drafts and will not be flipped to Live until it is ready for production.
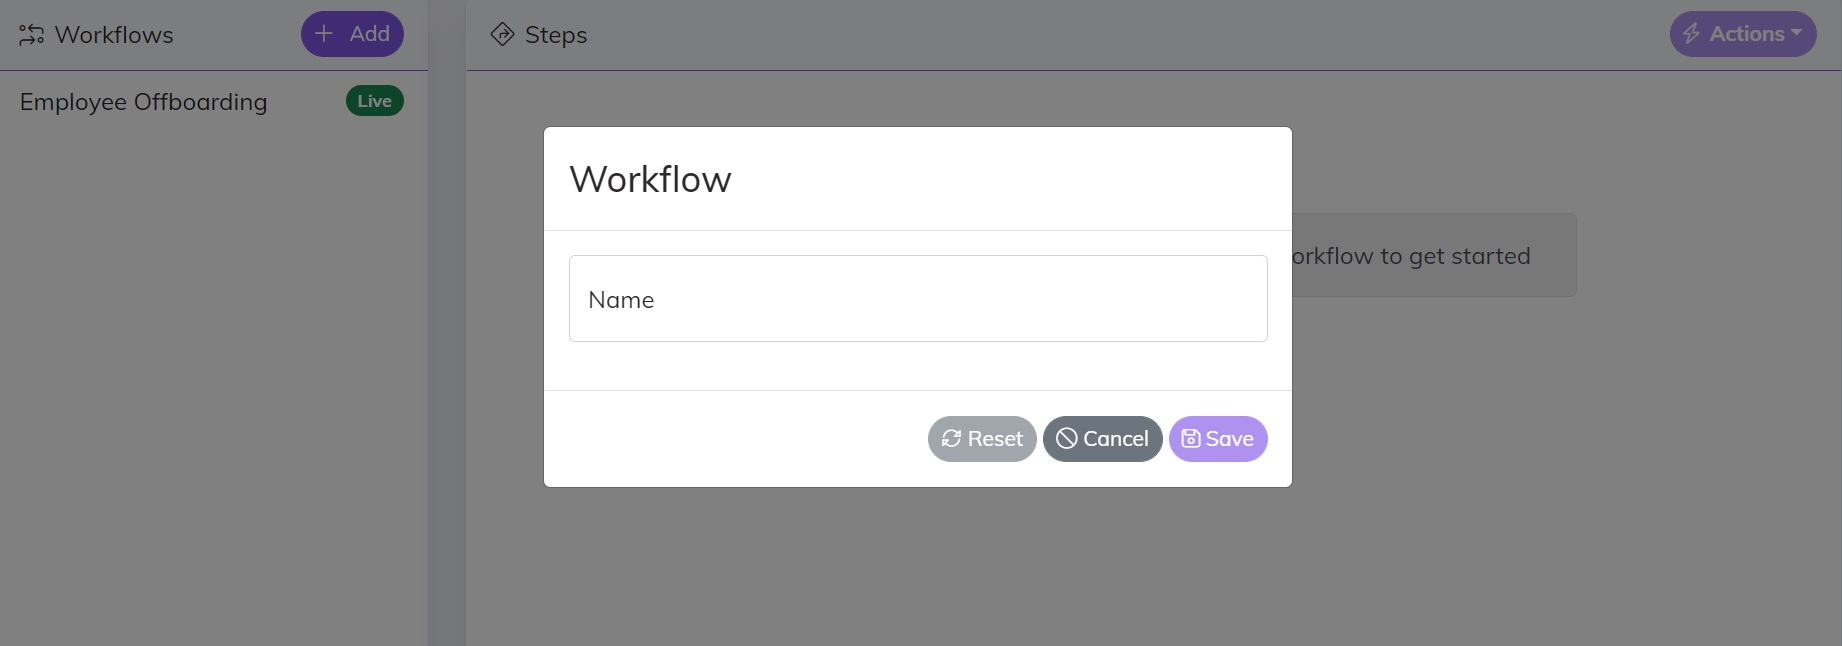
In the top right of the Workflow design view is an “Actions” button. The actions button contains all of the functionality on a Workflow. The action button for Workflow has some of the same capability as Data Hub - Code View, Deploy, Flip between Versions.
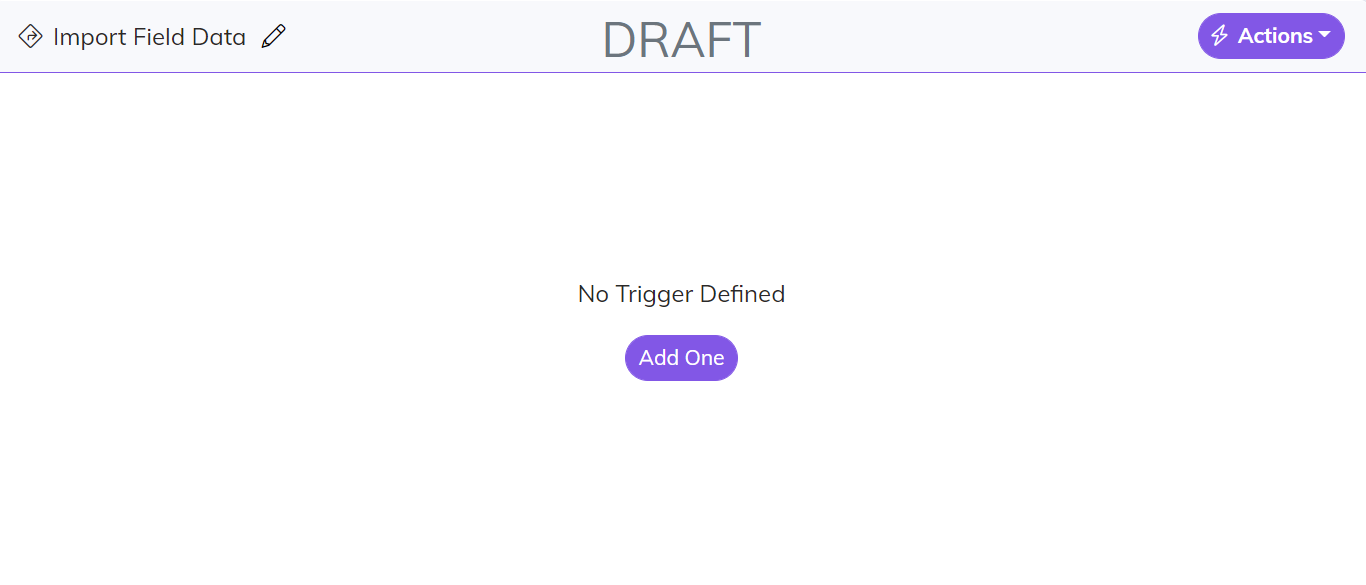
Add Trigger
The user experience for adding a Trigger to your Workflow is the same as adding a Data Hub Endpoint. Once you click the add Trigger button it will walk your through the 3 step process to….Select a Connector, give the Trigger a Name and Data Source, and then select the type of Trigger.
Add Steps
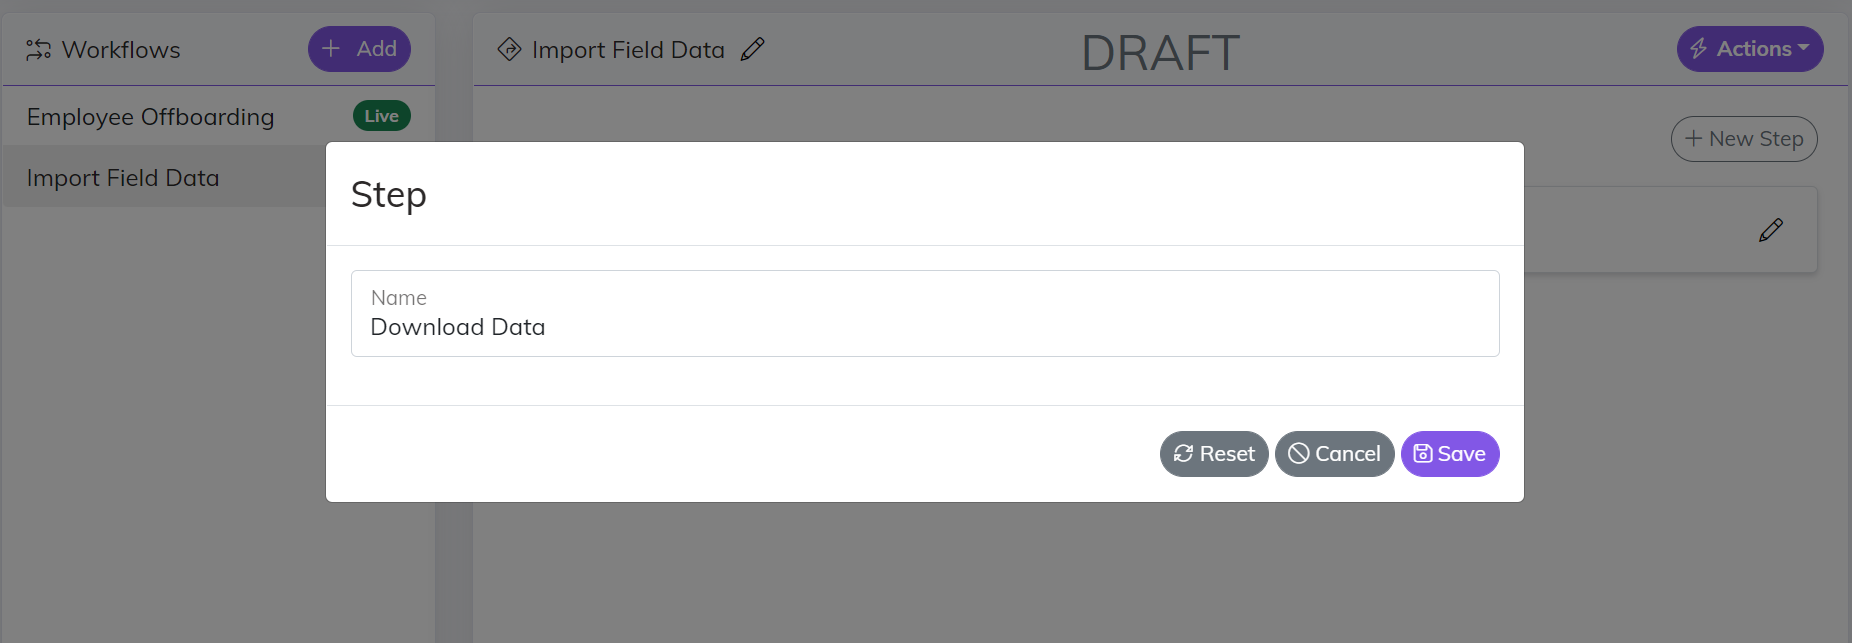
Once the Trigger has been added you are ready to start adding Steps to your Workflow. Click the “New Step” button in the top right corner of the designer and give the Step a name. There is no exact way to organize your Steps. Think of a “General” Step as a container for your Actions. You can have a single step with all of the Actions inside of it or you can group your Actions into multiple Steps.
Add Actions
Once the step has been added you can rename it, delete it, and manage the actions within it.

The final piece of your Workflow is to add Actions to take. Click the “Add Action” button in the top right of the Step and it will walk your through the process of creating an Action Endpoint. Adding a Workflow Action is the same bascic process as adding other Endpoints with the main difference being you have multiple options for the type of Action you can select.
- Save - kind of like a Subscriber step, calls a Connector save
- Set More Data - appends additional data to the item moving through the Workflow
- Simple Execute - executes some type of logic that takes in item moving through the Workflow
- Simple Execute No Input - executes some type of logic that takes in no input
API Gateway
As previously mentioned the API Gateway is at the center piece of the Central Integration Platform. Every bit of data that flows through Central goes through our API. That includes all of our messages, message logs, configuration management, querying data sources, etc
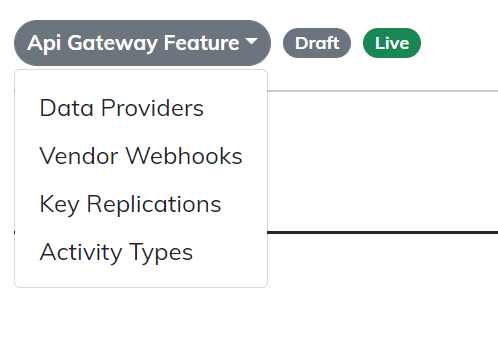
From a configuration stand point there are 4 main features you can configure on the API Gateway. Each feature has the same user experience to Add/Edit/Remove.
Data Providers
As mentioned in the Definitions section Data Providers are a way to “query” all of your Data Sources. Setting up a new Data Provider is the same process as Data Hub Endpoints, with the only exception that the type selected on the final step is “Data Provider”.
Vendor Webhooks
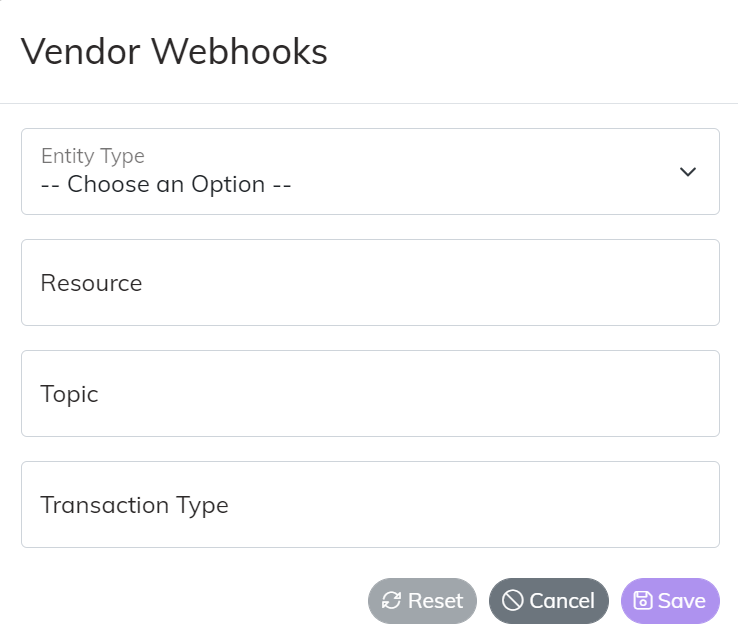
Central supports two types of Webhooks - Custom and Vendor. Custom Webhooks are covered in more detail in the “Developer” section of the documentation. Vendor Webhooks are implementation specific to the Vendor that is propagating the message. When setting up a Vendor Webhook there are 4 main inputs.
- Entity Type - type of data that is submitted on the Webhook
- Resource - most Webhooks have some type of scope or event type on the message, that is what we refer to as the Resource
- Topic - this is what routes the message to a particular topic in Central (warning this currently requires the user to input the “ID” in a future release this will be a drop down menu you can select from a list)
- Transaction Type - the default value for the Webhook should be “Save {Entity Type Name}”. You can however give the Transaction Type a more specialized value that the subscribers on this topic can be listening for i.e. Delete Data
Key Replications
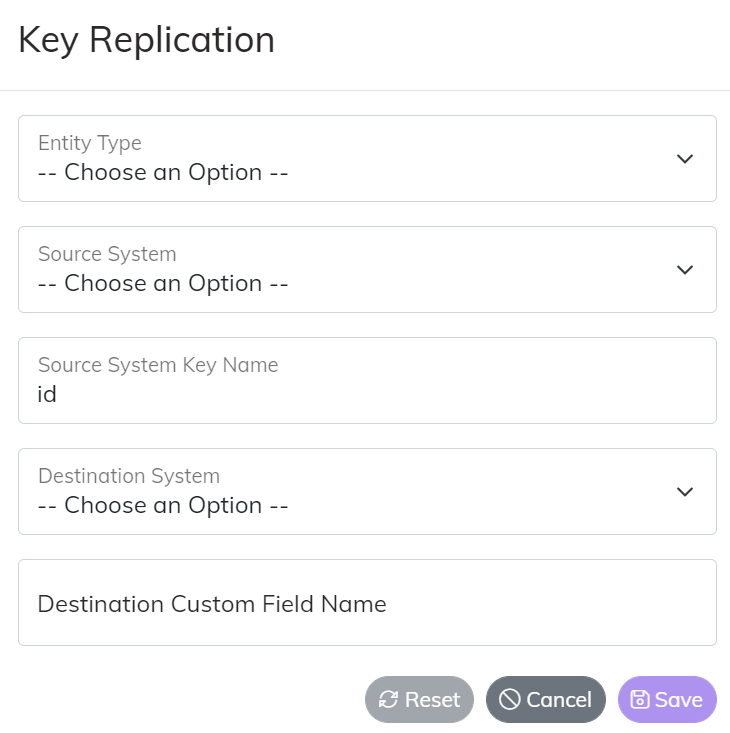
Key Replication provides the capability to take a unique/primary key from one system and replicate it to another system. The way in which this works inside of Central is the Key Replication Logic looks at the Index for the existence of a key for both the source and destination. Once the Index has both then the key is sent down and replicated to the destination.
When setting up a Key Replication there are 4 main inputs.
- Entity Type - the type of data we are replicating the Key for
- Source System - the name of the System the Key is coming from
- Destination System - the name of the System the Key is going to
- Destination Custom Field Name - the name of the field that is storing the replicated Key
Activity Types
Activity Types are a configuration setting for an app we call the Central Newsfeed. Activity Types are a way of configuring the types of data that you want included in the Newsfeed. Examples of different types of activity include New Employees, Sold Opportunities, Birthdays, Work Anniversaries. Really any type of data Central is processing can be included in our Newsfeed. If you have interest in configuring the Newsfeed for your environment please talk to your Sales or Customer Service Rep.
Endpoint Configuration
Endpoint Configuration is broken down into 6 major areas.

Data Source
Think of the Data Source configuration as the “tip of the spear” for the Endpoint. On a Web Services Endpoint this will be the routes that we hit to query and save data. For a Database Endpoint this would be potentially Stored Procedures or set of SQL Statements to access the data.
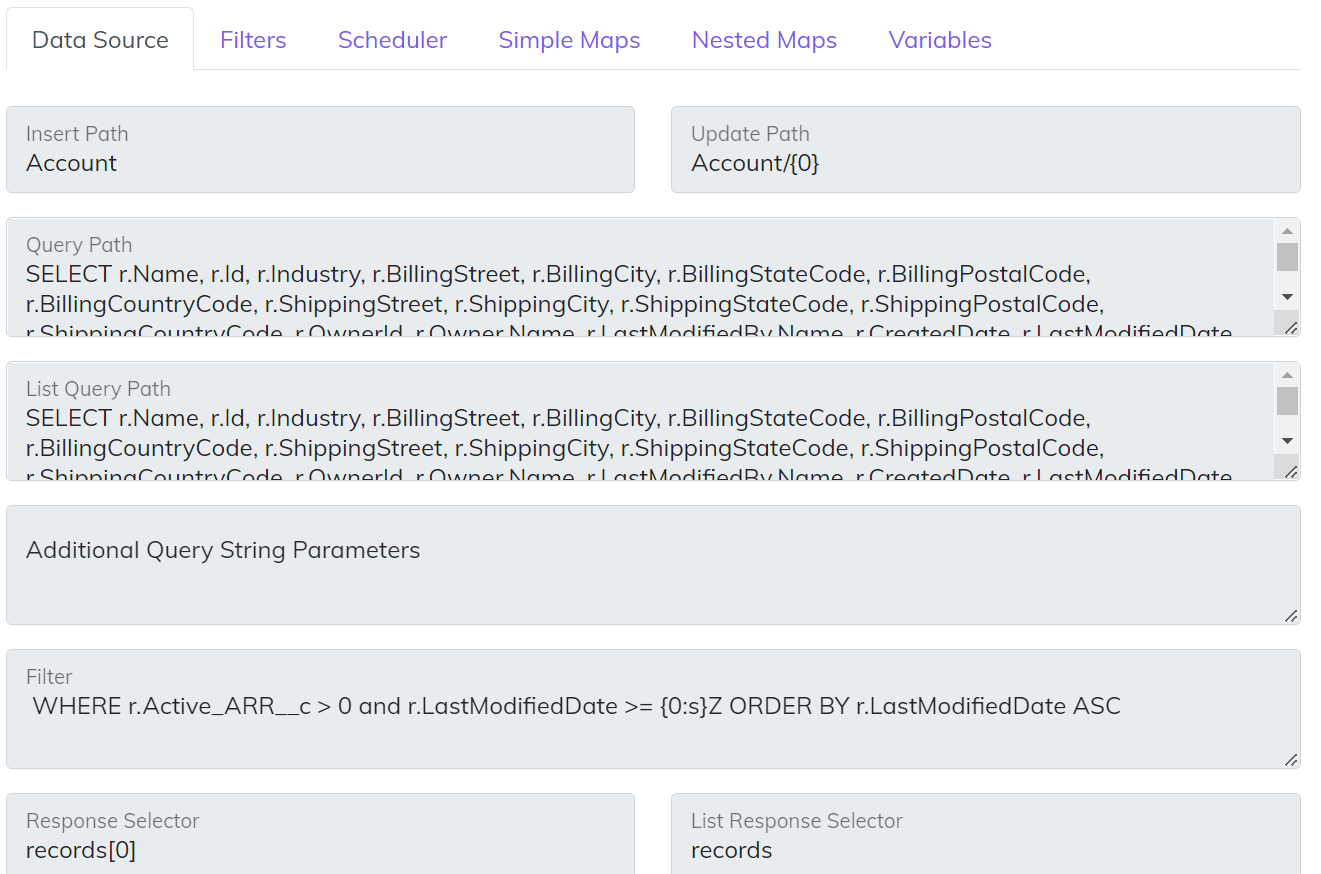
- Insert Path - POST route to insert an entity
- Update Path - PATH or PUT route to update an entity
- Query Path - GET route that is used to query a single instance of an entity. The syntax we use to inject some type of unique identifier /someentity/’{0}’. The ‘{0}’ will automatically put the value from the Primary Key map into the route. You can also attach “Additional Query String Parameters” on the back of the route to make the full route look like this {QueryPath}{Additional Query String Parameters}.
- List Query Path - GET route that is used to query a list of entities. When working with List data the full path of the GET route you can configure looks like this {Base Route from Connector}{List Query Path}{Additional Query String Parameters}{Filter}. The “Additional Query String Parameters” and “Filter” are not required. For some connectors the route is standard REST syntax /someentity?parm1=value. For other connectors like Salesforce (SOQL) and Dynamics (OData) they have more advanced query capability you can add into the route.
- Additional Query String Parameters - Use this feature on the GET route if you have some type of static Query Parameters you want attached to your GET and possibly used on both the Query and List Query. This can be helpful on things like OData “expand” capability.
- Filter - Use this feature to limit the data coming out of the Data Source. This capability for “Publishers” is used to query based on modification date. For example, you could have a filter with ?dateLastModified={0:s}Z that would filter out recently modified records since the last poll.
- List Response Selector - Use this feature if the data that you are querying is embedded inside of a property on the JSON. For example, Salesforce embeds the results in a property called “records”, so that value would be set for the List Response Selector.
- Response Selector - Use this feature just like the List Response Selector but for single instance. For the Salesforce example above the value would be records[0].
Filters
In addition to the Data Source Filtering you can also add on your Publishers and Subscribers to further restrict any data on the Endpoint that should be processed.
Scheduler
A Scheduler is a way to trigger an Endpoint for a given point in time. There are three different types of Schedulers

- Interval - Great to use for our “near real time” Publishers that wake up every minute or so and check for changes.
- Day of Week - Runs on specific days of the week and time.
- Day of Month - Runs on specific days of the month and time.
On a Day of Month schedule you can also set which we call a Run Condition with 4 main options.
- Any Day
- Week Day Only Advance - if the schedule falls on a weekend it “advances” to the next available business day
- Week Day Only Skip - if the schedule falls on a weekend it skips that run completely
- Weekend Only
Simple Maps
How Central implements mapping is one of the most important aspects of understanding the platform. The first major concept is that Central is built on what we call our common model. What that means is all of the data that is flowing through Central is associated to a particular type of entity (Person, Company, Sales Order, etc). Each entity type has aspects that are unique, which are classified as “Properties”. Think of a property as the First Name of a Person or the Order Date of a Sale. In addition to Properties all Central entities share three common aspects.
- Primary Keys - the unique identifers for the entity
- Foreign Keys - the link between two entities, as an example think of the ID of a Customer that is tied to a Sales Order
- Custom Data - the unique fields that allow you to extend our model for requirements that are unique to your specific business rules
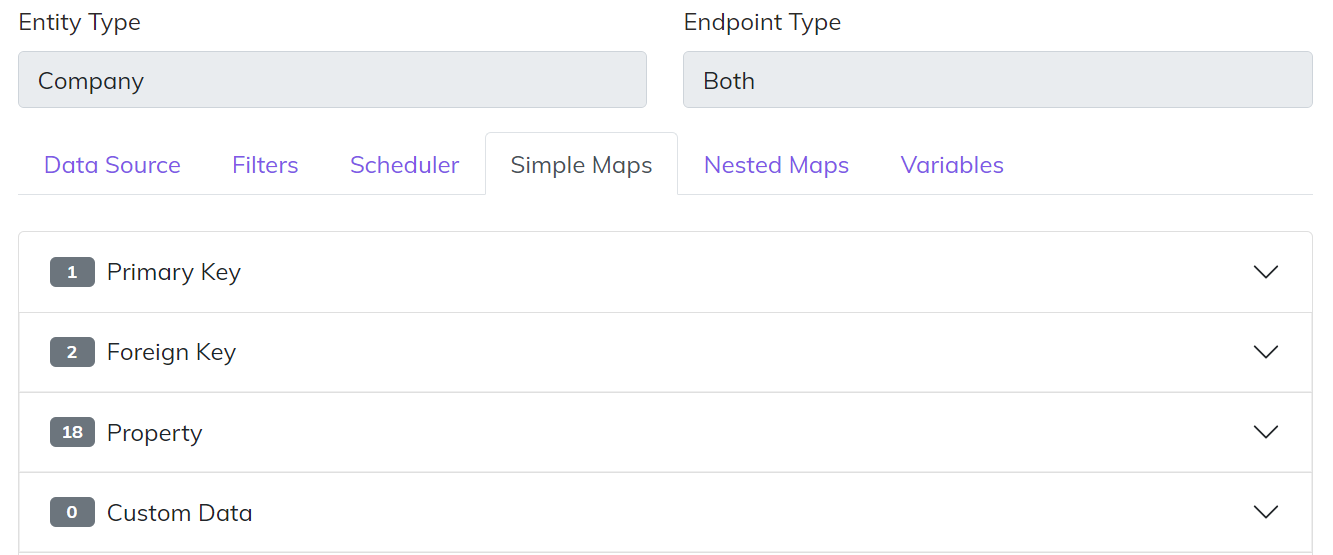
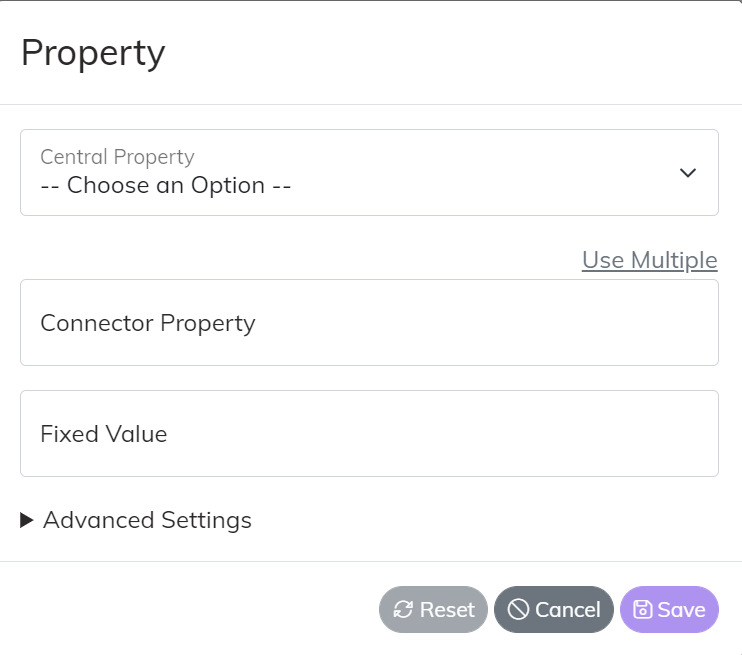
The reason this is significant to understand from a mapping stand point is when you map data from a Publishing Endpoint you will map the connectors data from their structure into the Central Common Model, and vice versa on Subscribing Endpoints you will map the data from the Central Common Model to the data structure of the connector. Each type of map has slight differences in how it is set. The example below is a Property map where you select the property on the Central Common Model and tie that to a property on the connector. You can also do things like set a fixed value if the value being set in either direction is always the same.
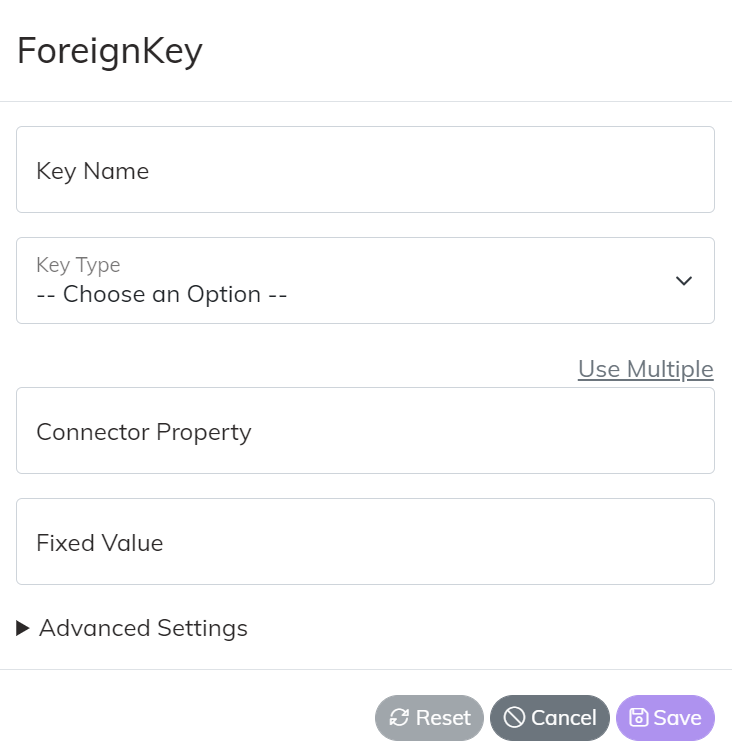
Foreign Key maps have a few more values to set. The Key Name is the unique name of the key on the model. It is critical that the Key Name matches on your entities across Endpoints. The Key Type represents the type of Entity the Key is associated to. In some cases a key will be associated to a generic domain value like Order Status or Employee Type. In those cases select “General System Lookup”.
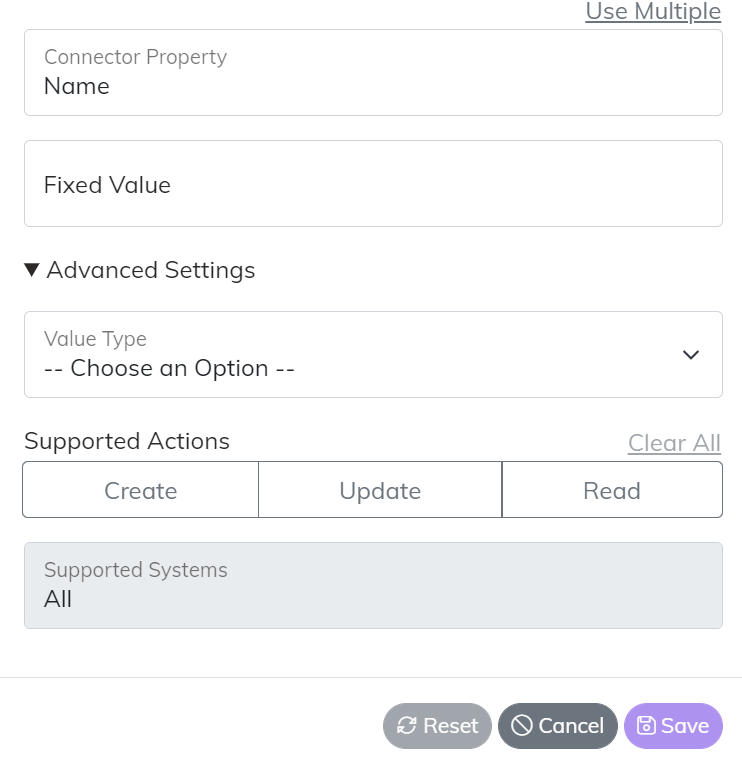
In addition each mapping type also has their own set of “Advanced Settings”. The example below on a Property map shows the ability that you can set the specific read/write operations that the map adheres to. Allowing the map to become read or write only on this particular Endpoint
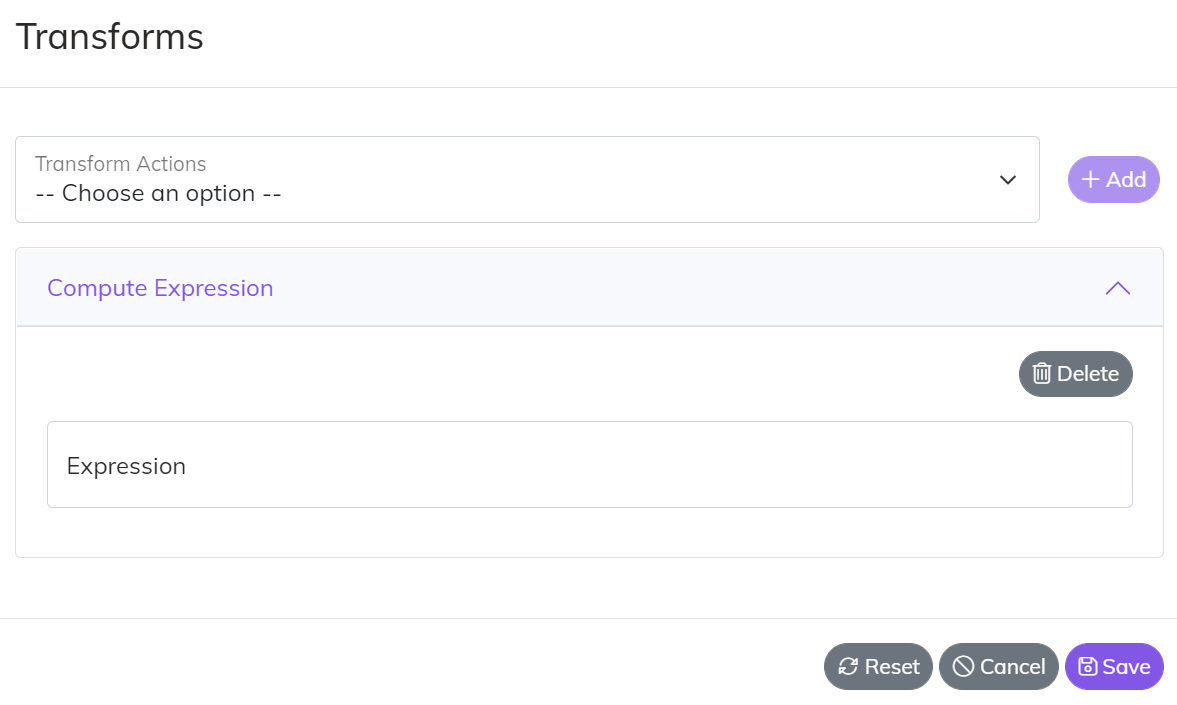
In some cases mored advanced mapping logic is needed to meet your specific business requirements. Those cases often require what we call “Mapping Transforms”. You can manage Transforms on a map by clicking the “wand” icon at the right side of each map item.

There are currently twelve different types of transforms we support. In some cases a transform requires the combination of multiple values. In this scenario for Publishing Endpoints click the “Use Multiple” link above the connector properties to add more than one connector to the map, and for Subscriber Endpoints use the “Multi-Value” mapping section.
- Business Logic Map - inject conditional logic into a map i.e. if this value equals this and another value equals that then return a value
- Business Logic Map Simple - same as Business Logic but streamlined i.e. this value returns that value
- Compute Expression - can be used for match computation on a map or more advanced logic that does not fit into a Business Logic Map. Compute expressions use the syntax provided by Microsoft .NET
- CSV to List - can take a comma separated value and transform it to a “List of strings”
- Default Value - executes on a create to set a static value
- Formatting Template - takes one or more values and returns a formatted string, great for things like formatting currency data
- Invoke Instance Method - can call a .NET “System” method on an instance class System.DateTime.AddMonths
- Invoke Static Method - can call a .NET “System” method on a static class System.Math.Round
- Invoke Static Property - can call a .NET “System” static property System.DateTime.UtcNow
- JSON Contains - can look for the existence of a value in a JSON string
- Parse to JSON - can take values off of the model and generate sections of JSON data
- Regex Replace - use Regular Expressions to change the value of a map
Nested Maps
Nested maps are used in two main scenarios.
- If you have a very hierarchical and complex JSON or XML structure that needs to be created
- If you have a Child List you want to create. An example of a child list may be something like a list of Line Items on a Sales Order.
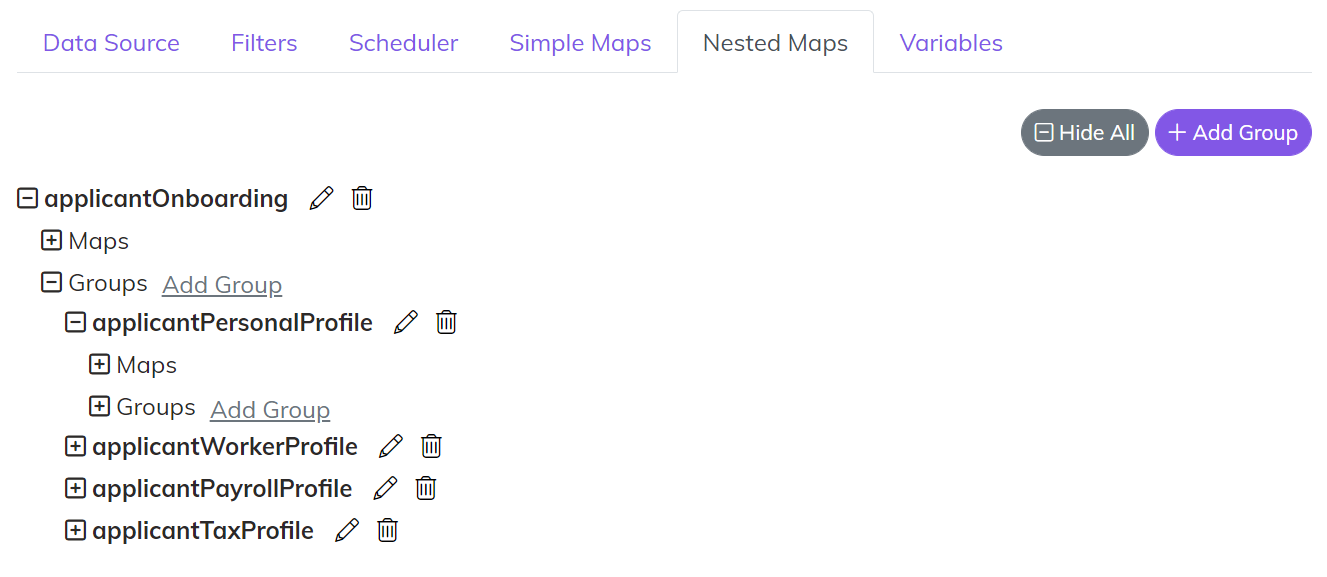
Each section of the Nested Map is broken out into Groups. You can create as many groups as needed and you can nest a Group within another group. Inside of a Group are the Maps. That is where the Specific Mappings are set just like the Simple Maps (Primary Key, Foreign Keys, Properties, Custom Data).
Variables
Variables are a way of injecting Global Values into your Endpoint. The following Connector Endpoints can use Variables today.
- Active Directory Users - isEmployeeIdUnique
- ADP Workers - templateName
- O365 Term Store - siteName, termGroupName, termSetName
Endpoint Relationships
There are two type of relationships you can create between Endpoints.
- Children - a Child Endpoint has a different Data Source than the Parent, but is processed in the same message payload as its parent. An example of this could be Line Items on a Sales Order. This is very similar to a Nested Map List. The difference is the calls to save the Line Items are on completely separate routes and calls per Line.
- Dependent Publishers - a Dependent Publisher is used when one Endpoint must ensure that it is completely in sync before its dependency can try to sync. An example of a Dependent Publisher would be something like a Customer Endpoint and and Opportunity Endpoint. In all likelihood the Opportunity has a dependency to a Customer. The Dependent Publisher ensures that all Customer records have been synced before any potentially dependent Opportunity Records can be synced.
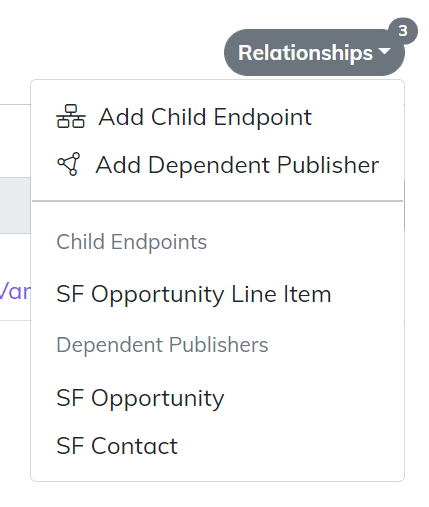
Relationships are managed in the top right corner of the Endpoint. You can view all of the Relationships and add new Relationships from this drop down menu.
Deployment
As mentioned previously Central has a built in version control feature with 3 main stages Draft, Live, and Previous Deploy. The deployment screen is the main area where versions are managed. Each capability within Central (Data Hub, Workflow, API Gateway) all use the same flow for build and deploy. This flow starts with creating a Draft on the Build screens to design and build the configuration to meet your requirements. Once that Draft is complete and ready for production you will flip it to Live. If there are issues with something that is Live and you need to revert back to a previous configuration you can do so by deploying a Previous Deploy.

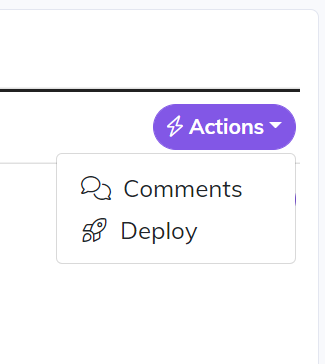
The Actions button next to each version is where you go to add comments and release notes to your deploy. The Actions button is also where you go to trigger a deploy. When triggering deployment the selected Draft version is moved to Live and the current Live version is moved to Previous Deploy.
Monitoring
Message Logs
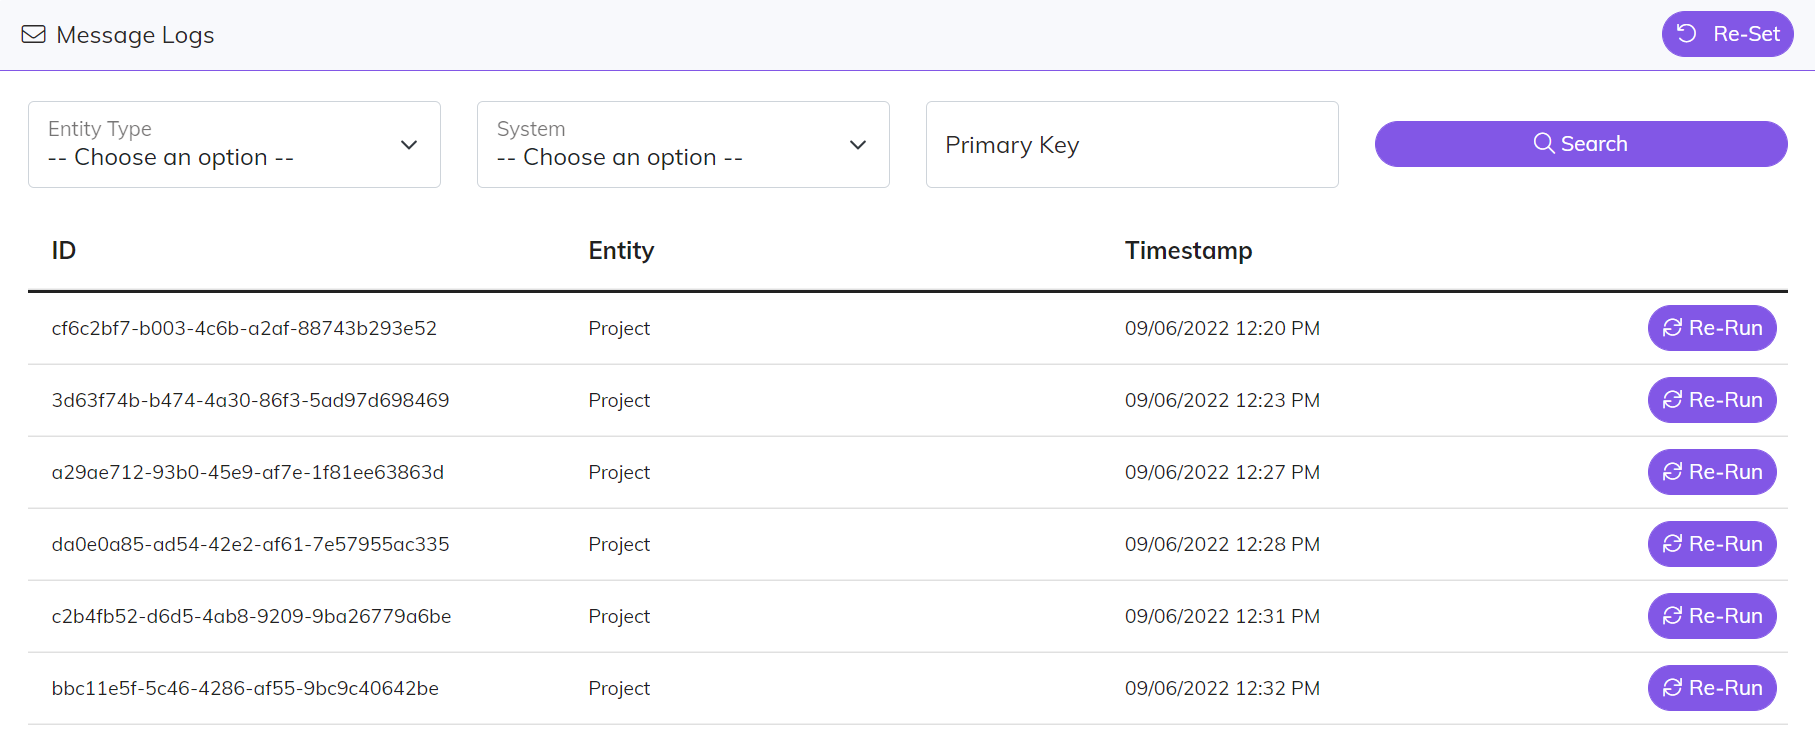
Think of a “message” as the container or wrapper for the data that is moved throughout the Central Integration Platform. The payload within the message stores the data that is used by the Endpoint to perform some type of data transaction. The Message Log capability allows you to search for messages by any combination Entity Type, System, and Primary Key. In addition to searching and viewing the message, you can also re-run a transaction that may have failed for some reason.
Individual Connector Instructions
Salesforce
Dynamics
Netsuite
Hubspot
BigCommerce
Payload
ADP
UKG
Taleo
Degreed
Autodesk
